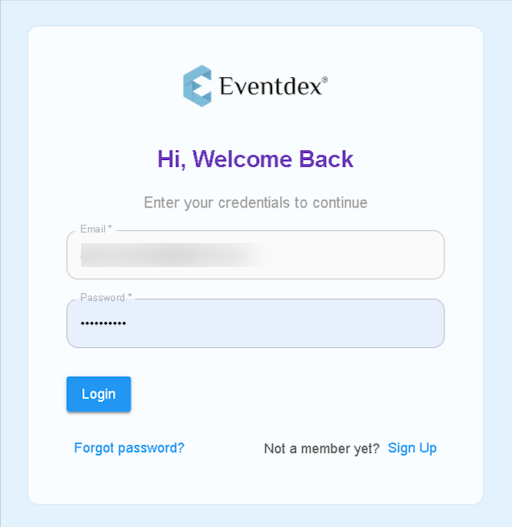
ScanAttendee Web Portal URL : https://sa.eventdex.com/login
Step 1: Login using your ScanAttendee credentials.
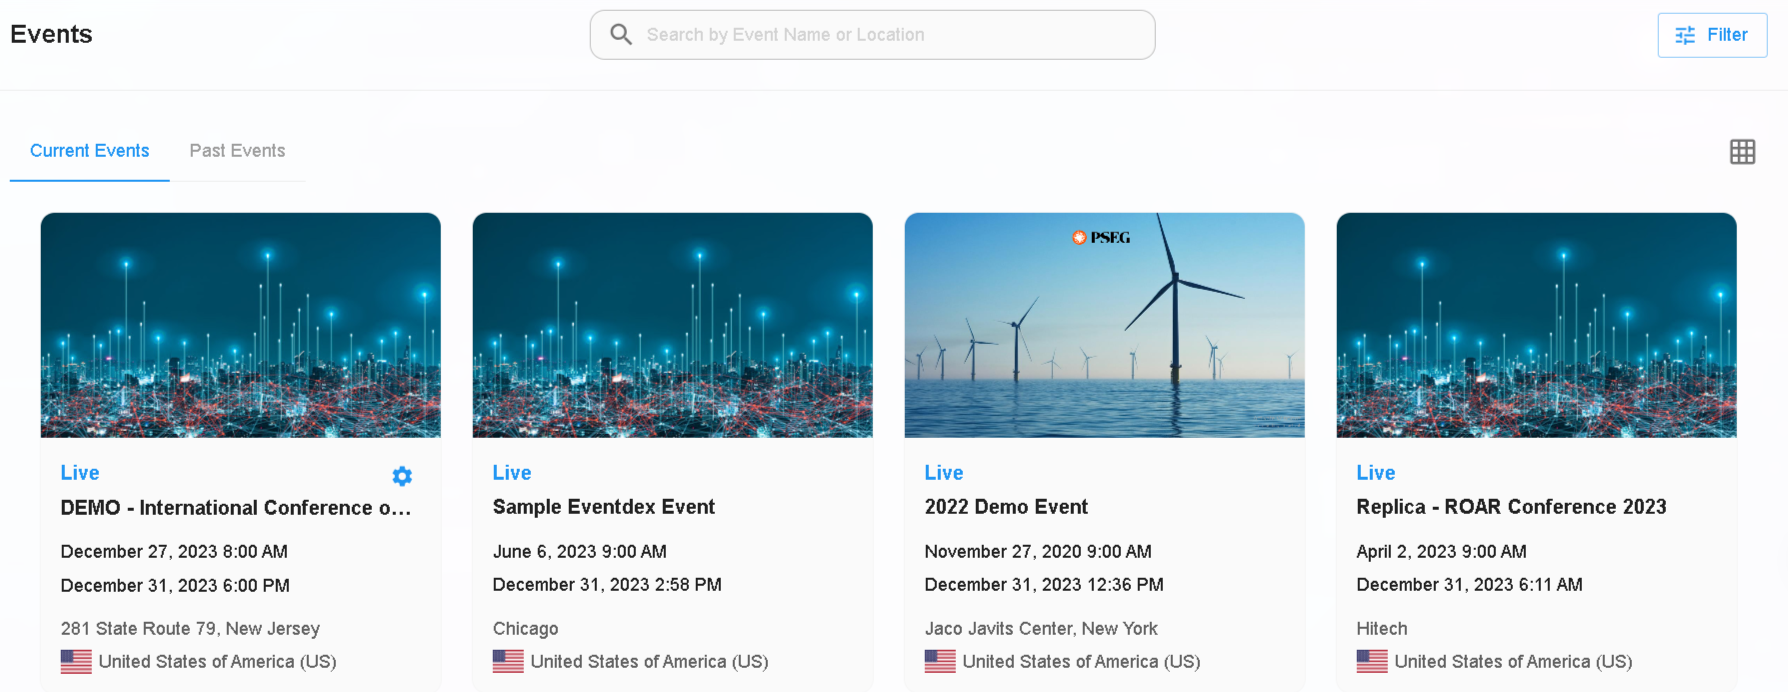
Step 2: Select the event you want to create a badge for.
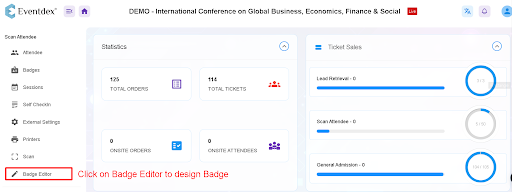
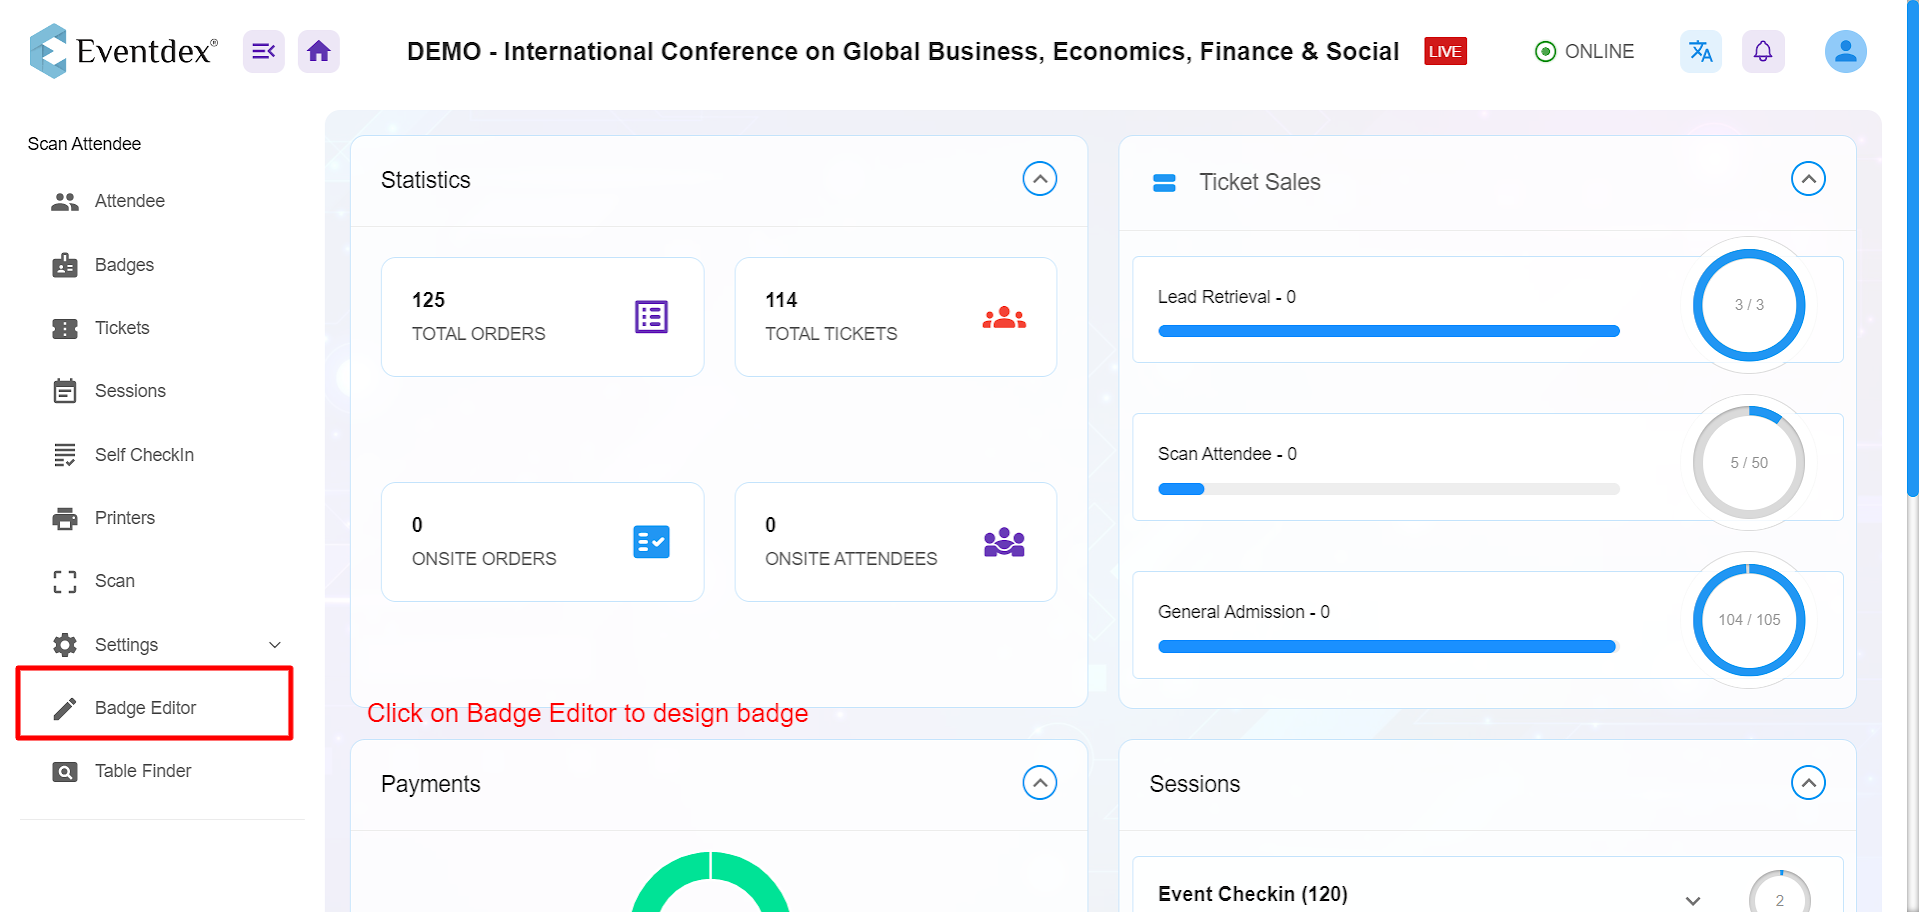
Step 3: Click on the Badge Editor to design the badge, as shown in the image below. The page will redirect to the Badge Creator page.
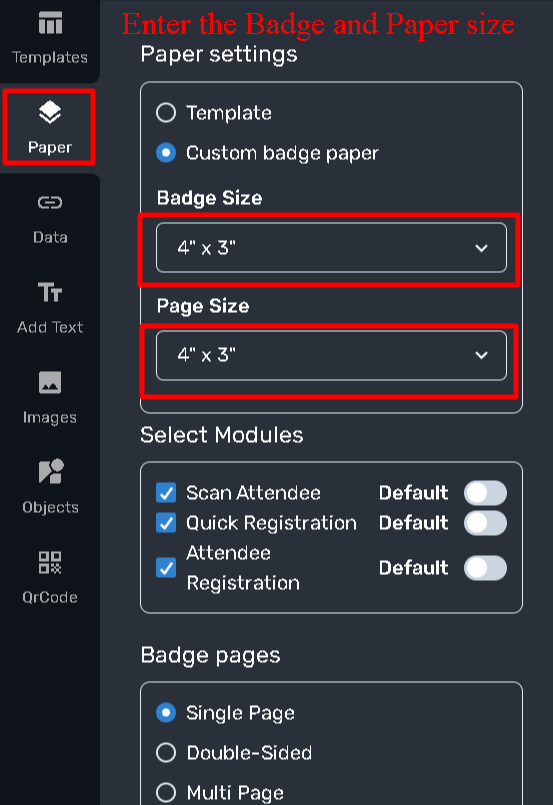
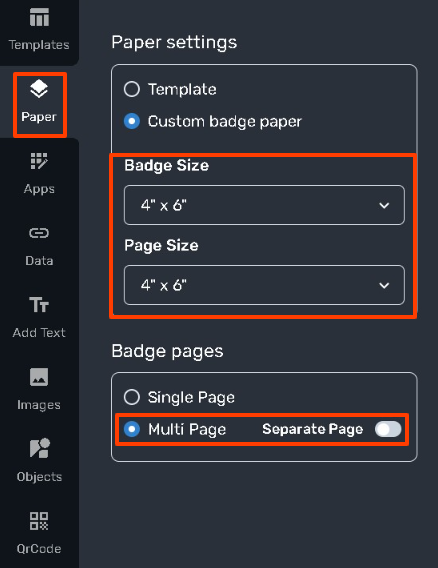
Step 4: Click on paper settings. You can select Template or Custom Badge paper and change the badge and its paper size at the left panel of the badge tool.
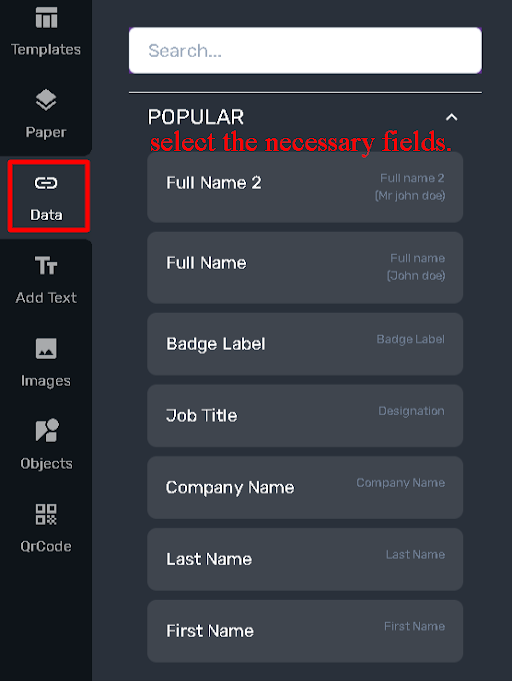
Step 5: To add attendee data, click “Data” and select the necessary fields you want to display on the Badge template.
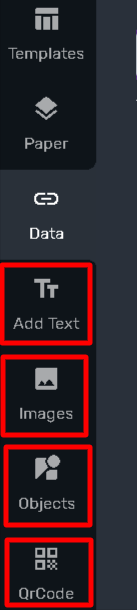
For QR Code, Image, or Add Text, select the options from the left panel of the page.
Text
- Click on Add Text to add customized text to the badge.
- You can change the Style, format, and color of the text.
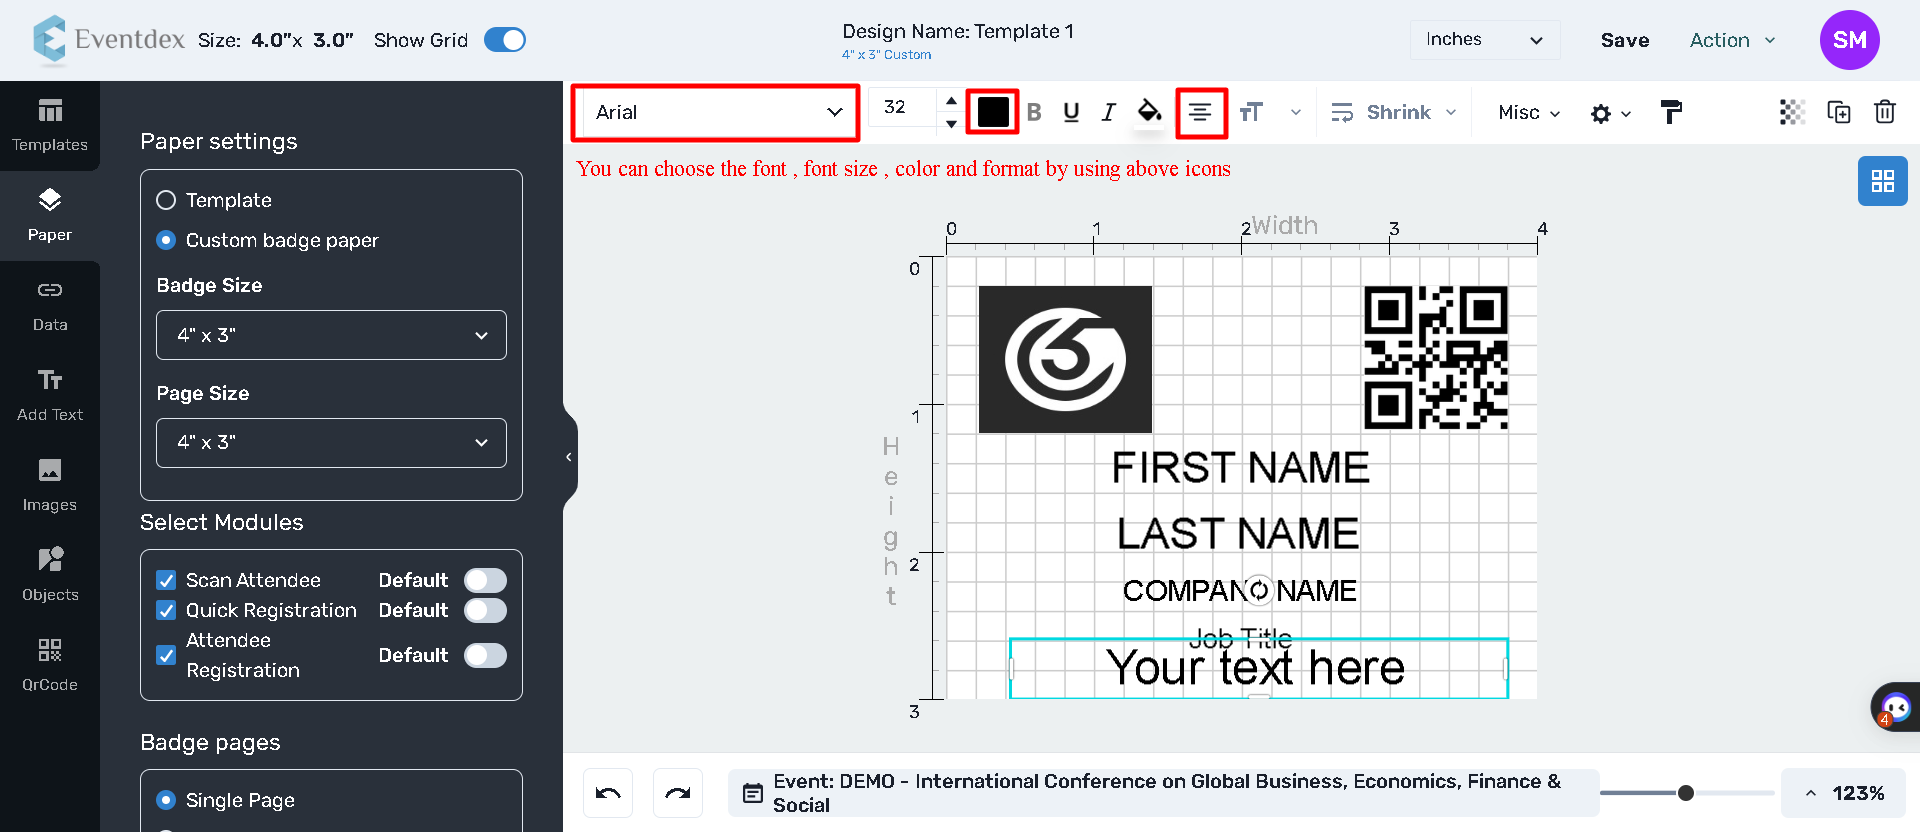
- As per your requirement place the text anywhere on the badge template, by moving the text box and place it within the badge template.
Image
Click on Image to add a new layer section.
Click on the image in the Badge template and choose an image from your desktop.
- Upload from computer: To add an image click Choose file
- Remove image: To remove the image from the badge template click on the Remove Image button
- Delete Layer: To delete the image layer click on the delete layer
QR Code
Click on QR Code to add a new layer section.
You can resize QR Code size by just dragging its edges.
Objects
Click on Objects to add a new layer section.
You have the option to change the Object to a Circle/Rectangle.
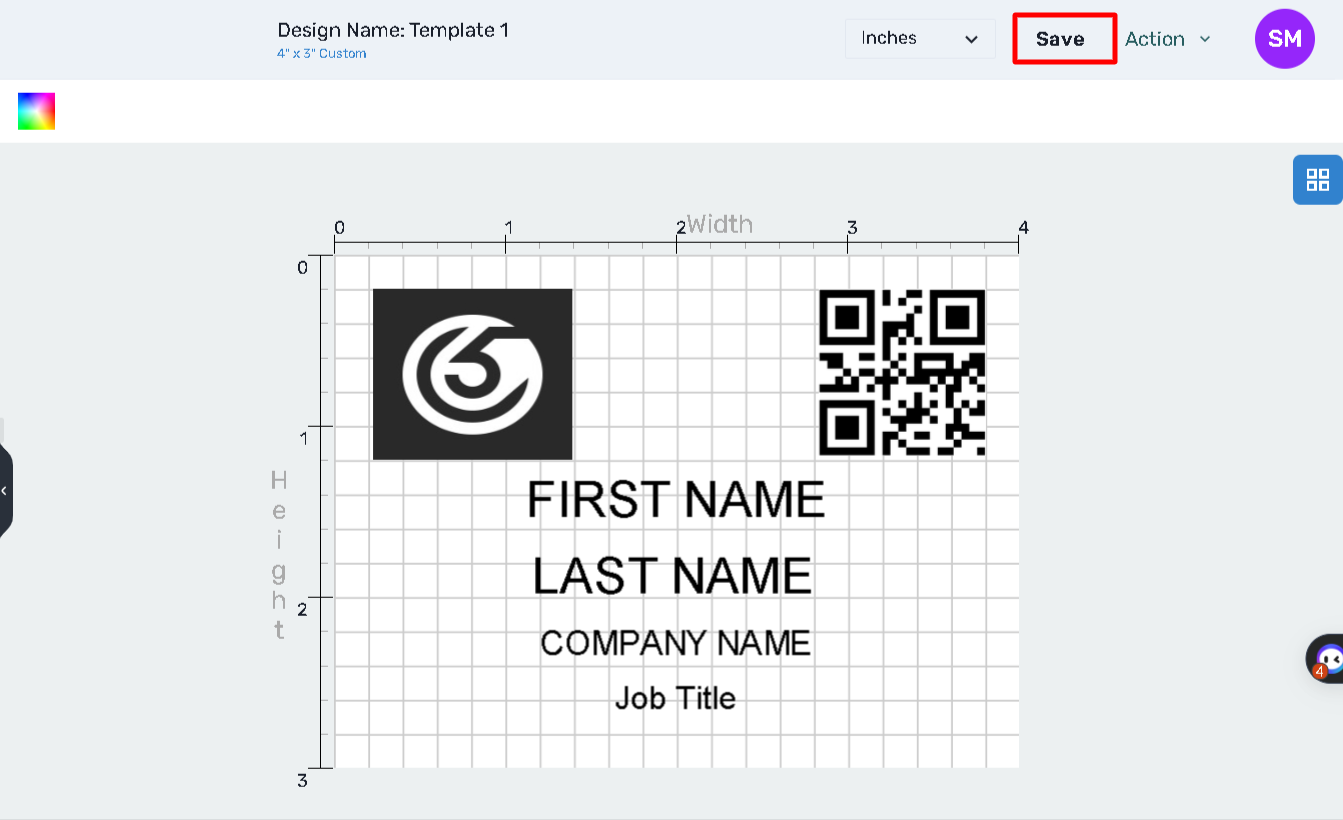
Step 6: Make sure to save the badge.
How to create 4X6 double-sided Badge :
Click on the Badge Editor to design the badge, as shown in the image below. The page will redirect to the Badge Creator page.
- Click on the paper settings option.
- Choose the Template or Custom Badge paper and select the badge with its paper size as 4X6.
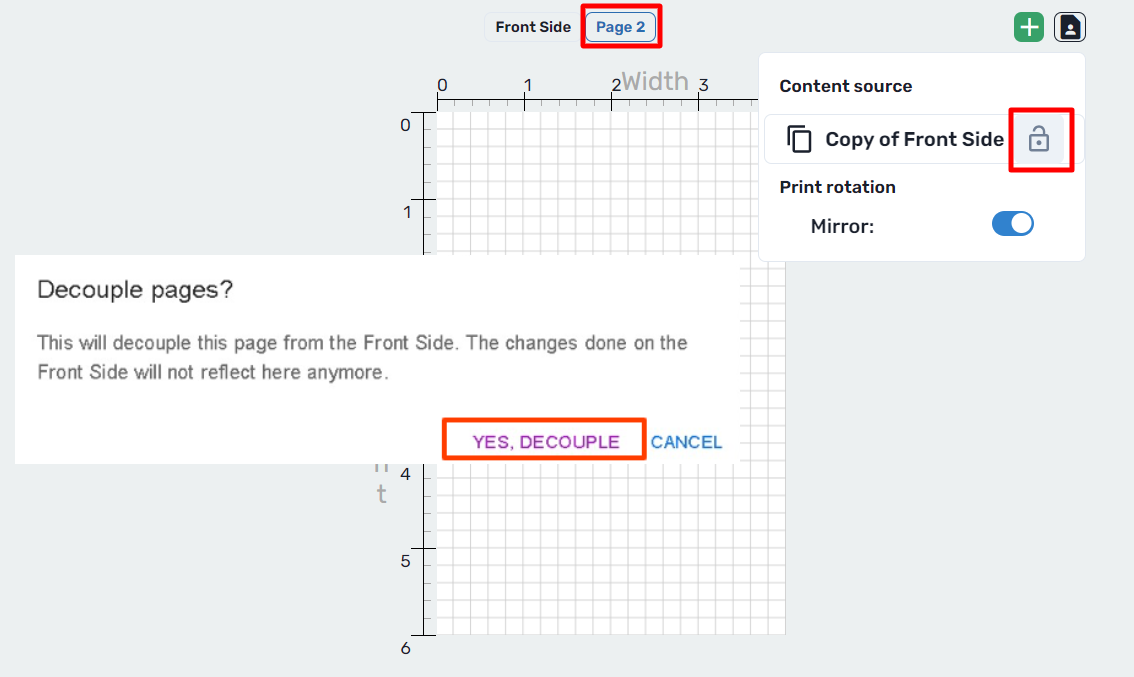
- Then, enable the Multi Page option on Badge Pages located on the left panel of the badge tool. Don’t enable separate pages unless it is required.
You can copy the content source of the front side of the badge by enabling the Mirror option. This will replicate the information present on the front side of the badge.
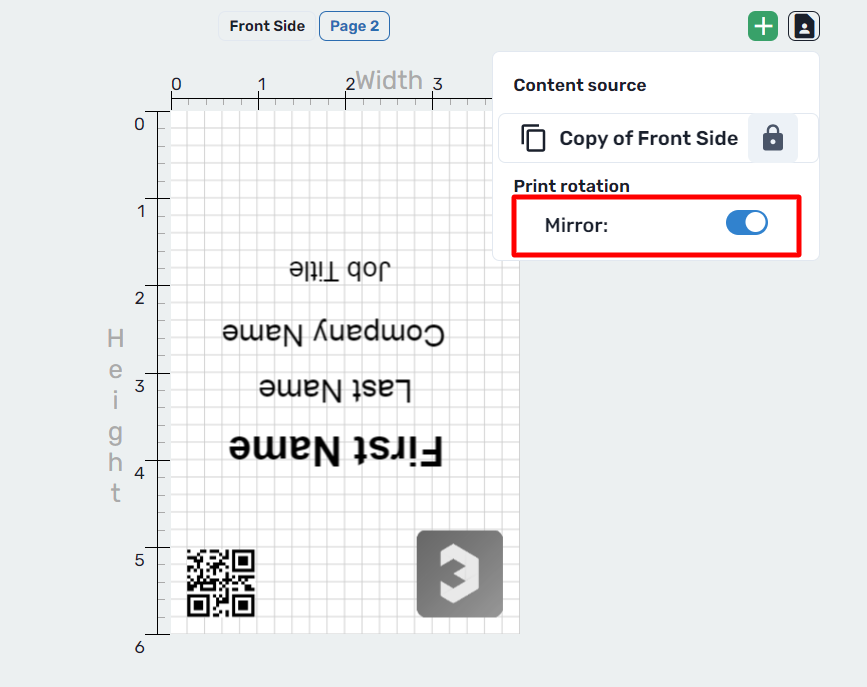
By unlocking the copy of the front side, you can choose not to duplicate the content source of the badge. This will allow you to modify the back side of the badge without copying the front side.