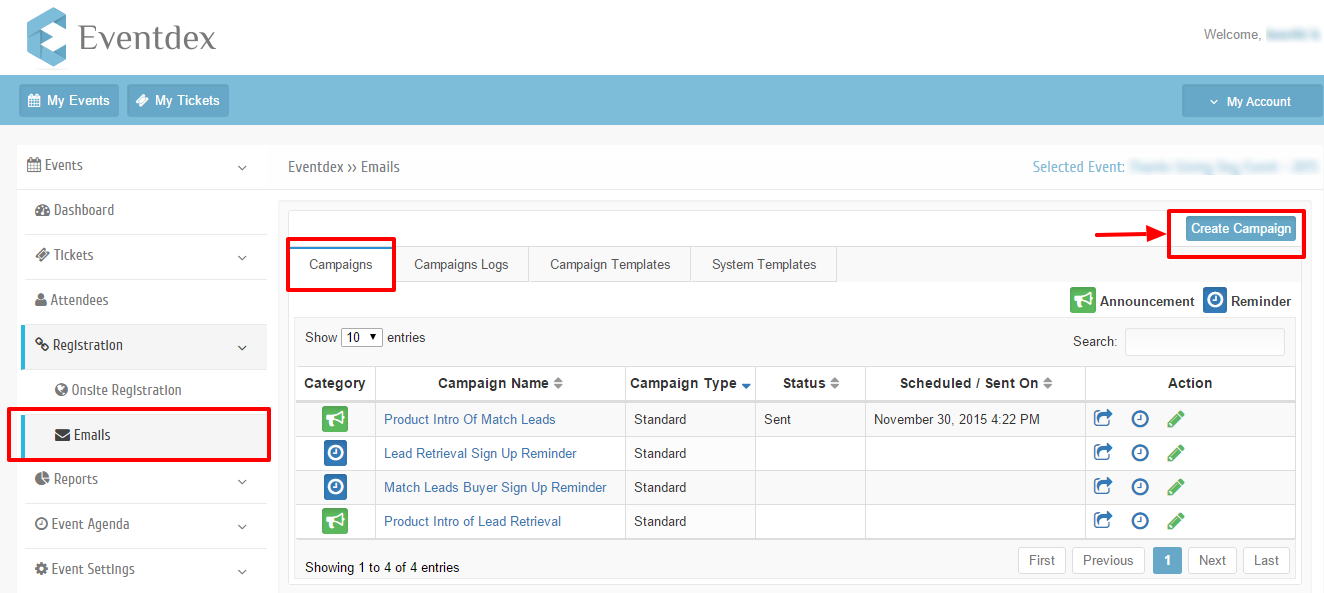
Path: Login into Eventdex account > Manage Event > Expand Registration tab > Click on Emails
Step 1: Click on Create Campaign
Step 2: Select Campaign type and click on the Next button
- By default campaign type is set as Announcements.
- From the Name field directly fetch and display the login user name.

Step 3: Select Recipients from the list and click on the Next button.
- You can run campaigns for all recipients registered to an event or only to a certain group of recipients by using filters.
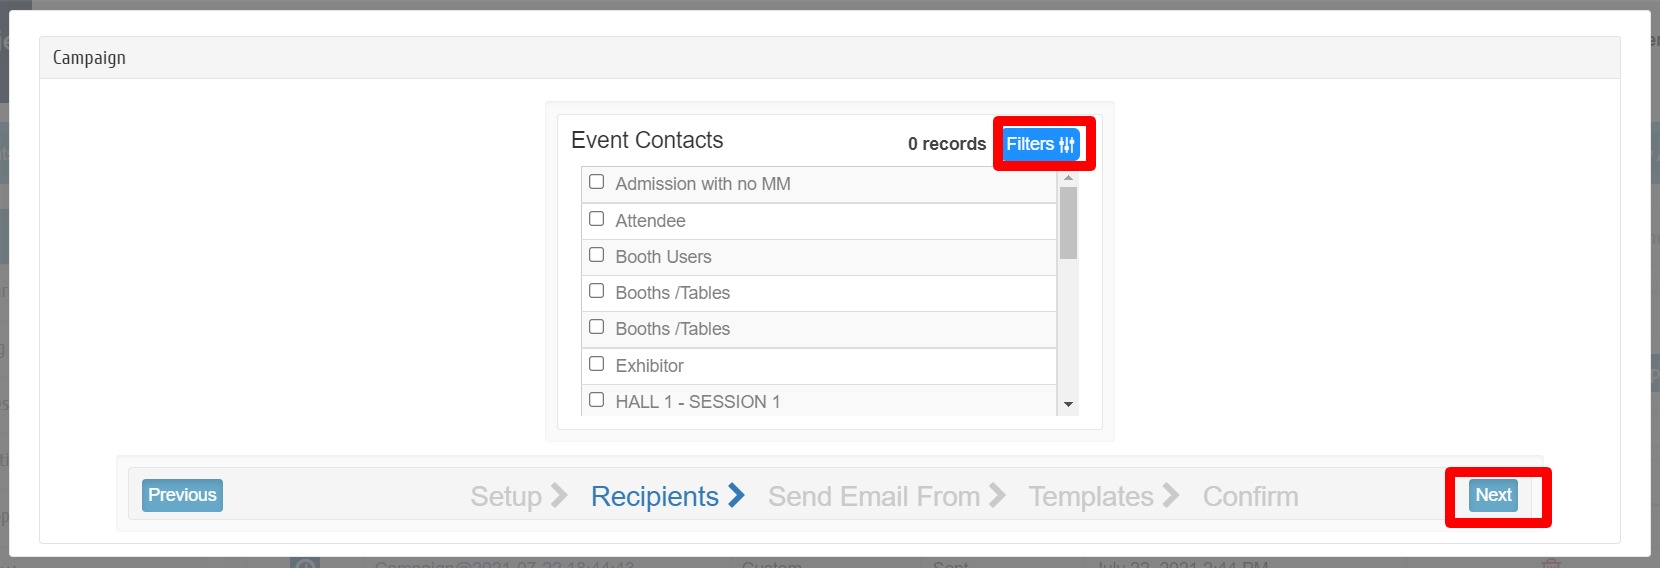
Filter options:
- Status: This will be useful for matchmaker users who are active/inactive.
- Badgable: You can send the campaign to badgable and non-badgable attendees.
- Badge status: You can send the campaign to badge status printed and not printed.
- Signup: You can send the campaigns to attendees who have already signup already and new users.
- Registration Type: You can send the campaign for Online, import, manual attendees.
- Appointments: You can send the campaigns to Only accepted, Only pending, Only canceled, Attendees have meetings, Zero meetings.

Step 4: Once you selected the ticket and click on next it will lead you to Postmark.
Postmark: Eventdex is partnered with a postmark to send email campaigns.

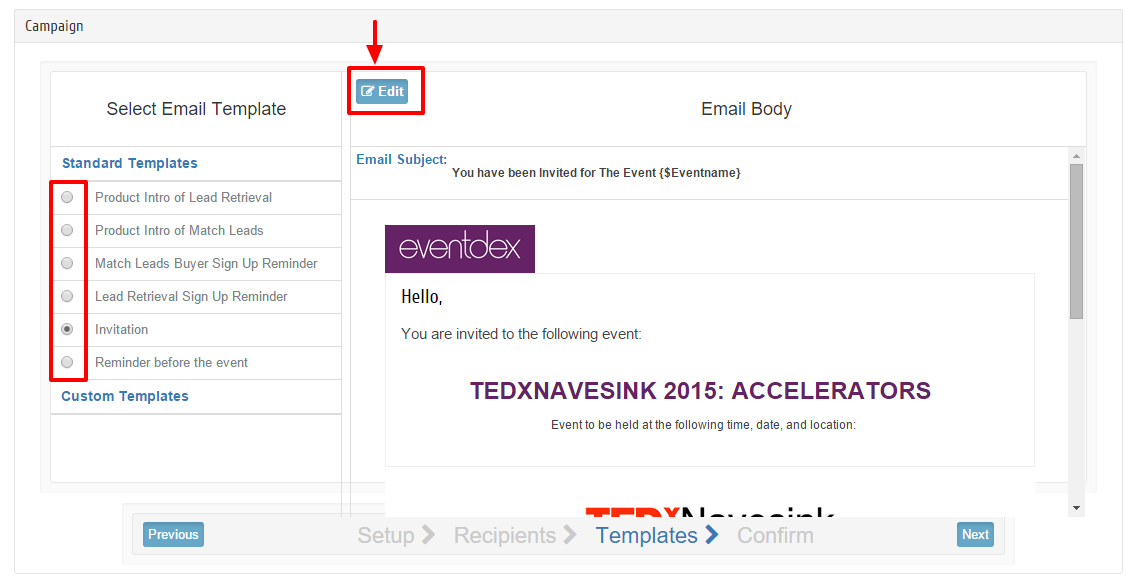
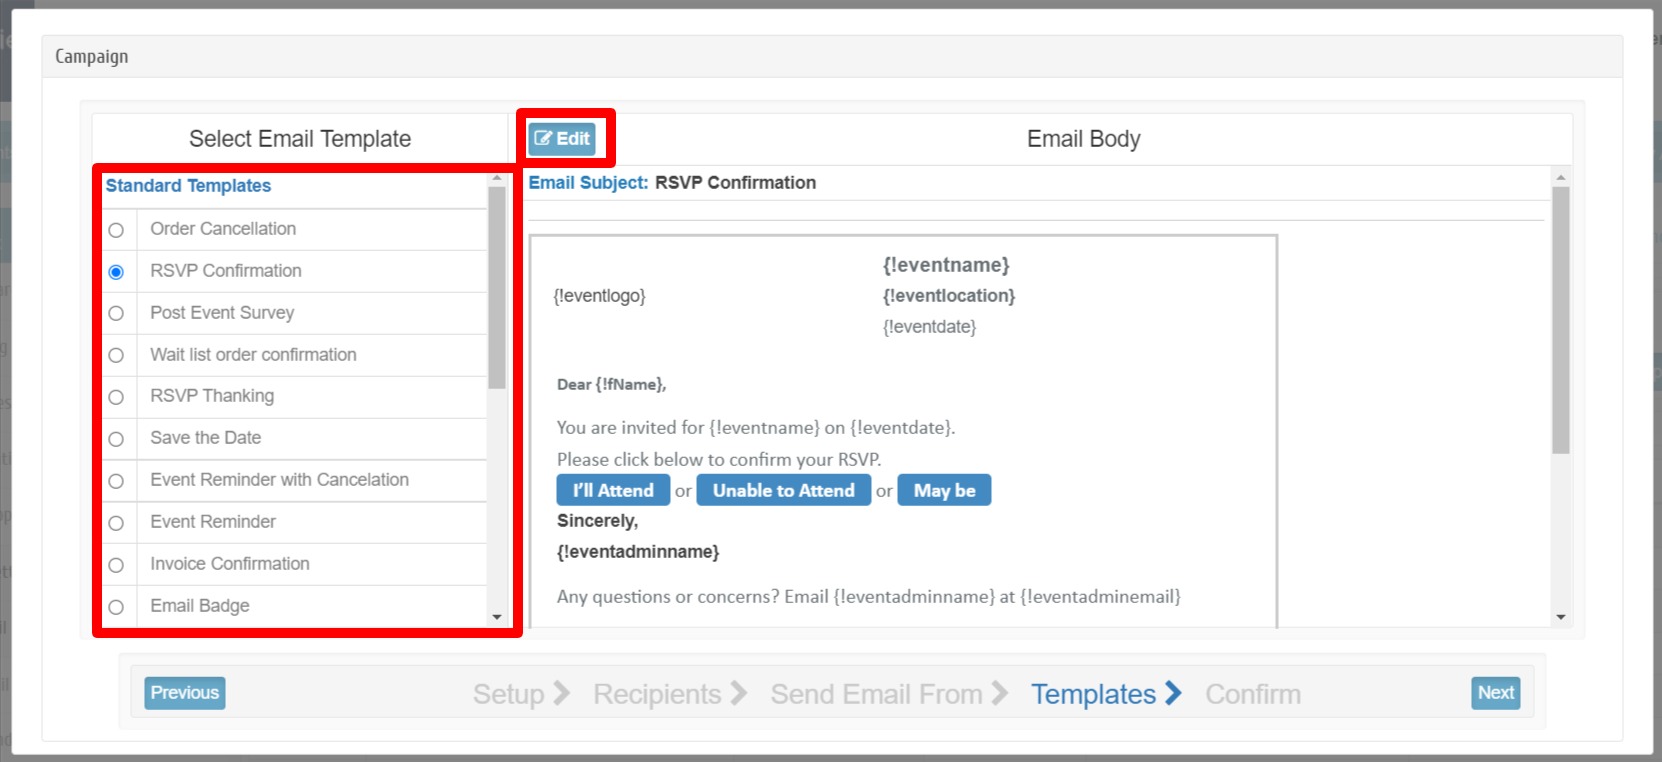
Step 5: Select the Email template.
Select any one of the Standard templates and click on Edit.
Step 6: Select the Email template.
Select any one of the Standard templates and click on Edit.
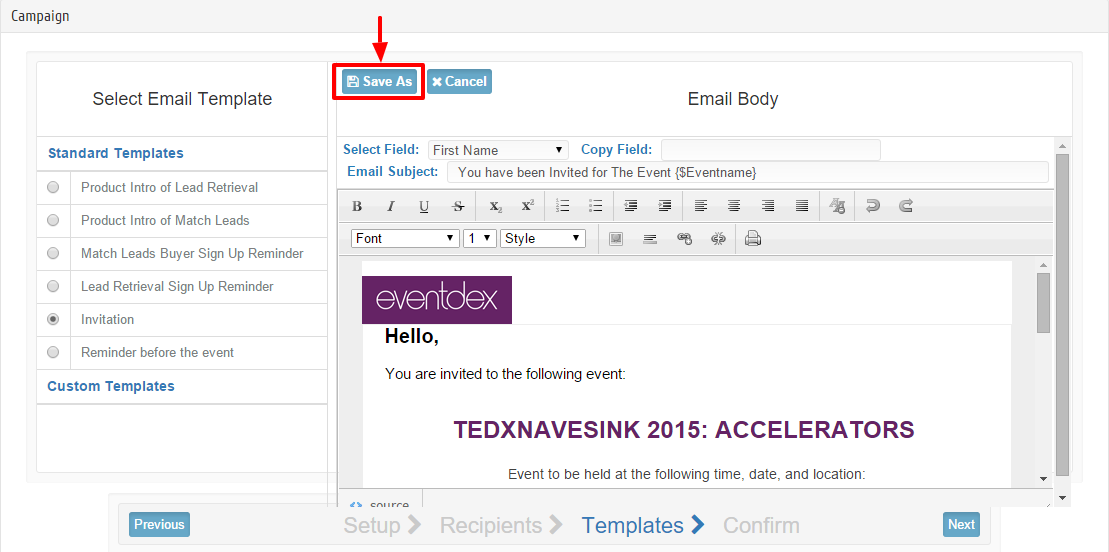
Step 8: Edit template as per your requirement and click on Save As button to apply changes to the template.
Step 9: Give new template name and click on Save button.
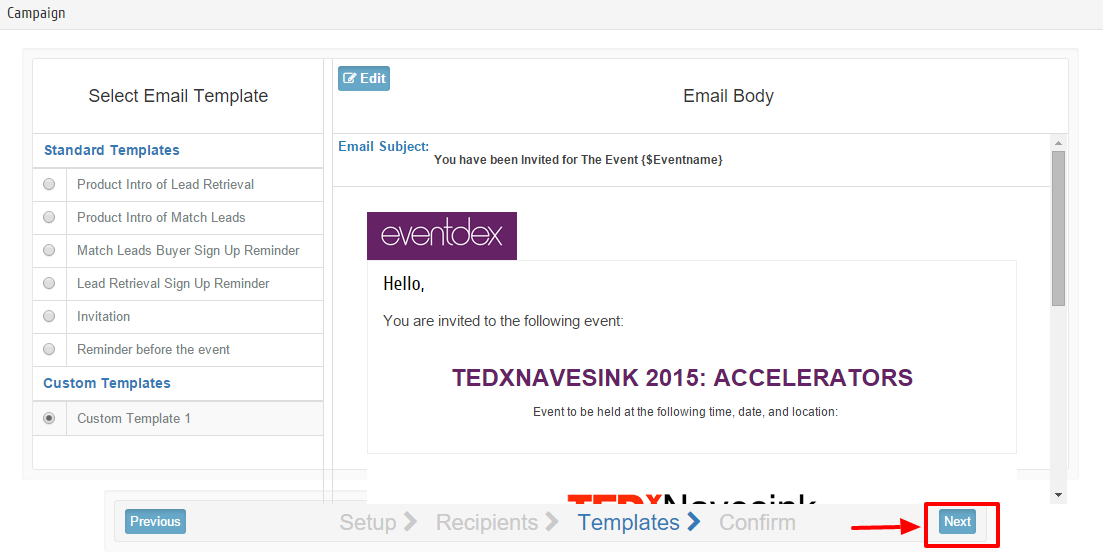
Step 10: Click on Next button
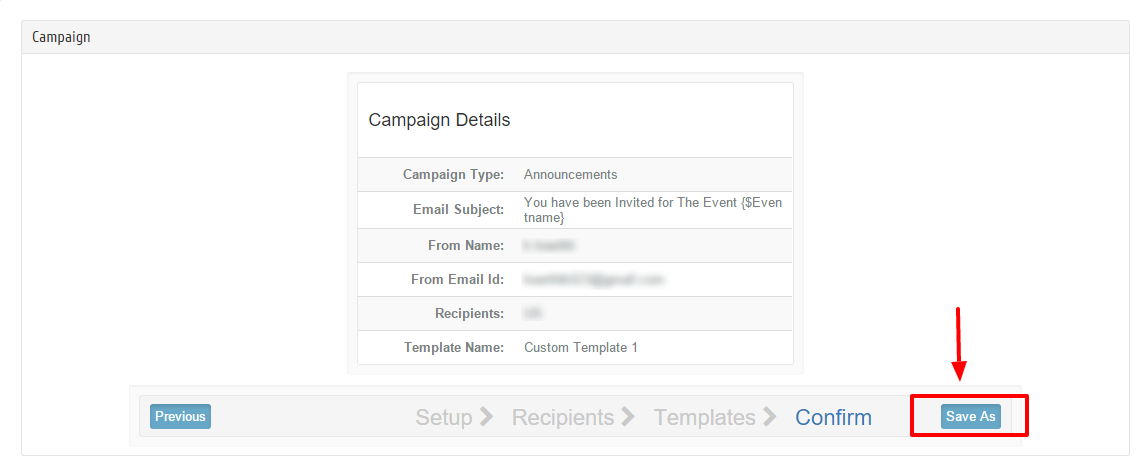
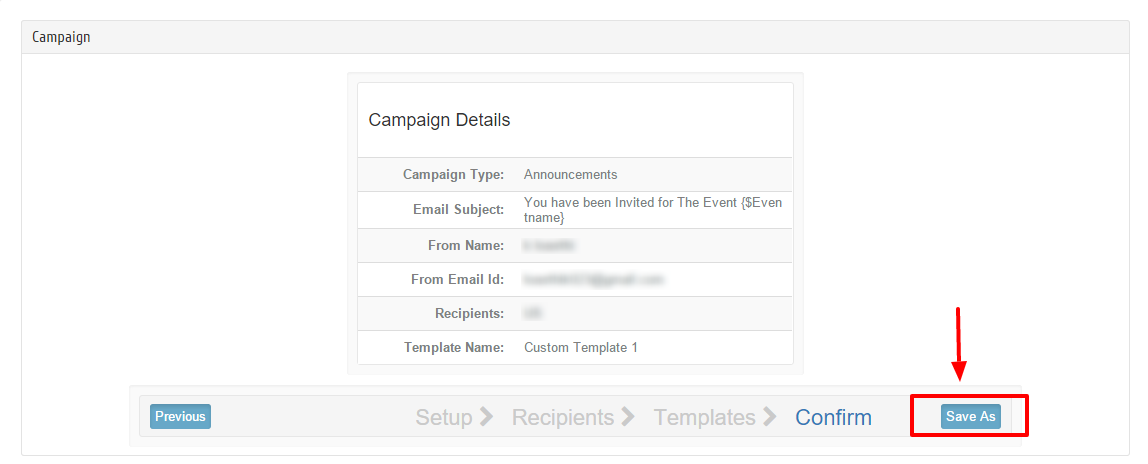
Step 11: Recheck the campaign details and click on Save As button
Step 12: Give new campaign name and click on Save button.
All Standard Templates will be displayed under Standard Templates Section.
All Custom Templates will be displayed under Custom Templates Section.

