
Getting Started with Eventdex: Create, Configure & Publish Your Event
By support
EVENT ORGANIZER GUIDE Getting Started with Eventdex: Create, Configure & Publish Your Event
Follow this guide to create your event, configure tickets, select a registration
template, and publish your event with Eventdex.
Before you begin:
Make sure you have an Eventdex account and are logged in before creating your event. STEP 1
Create Your Event
Start by creating your event and entering the basic information attendees
will need to know.
1
Log in to Eventdex
Go to the Eventdex portal and log in to your Eventdex account.
2
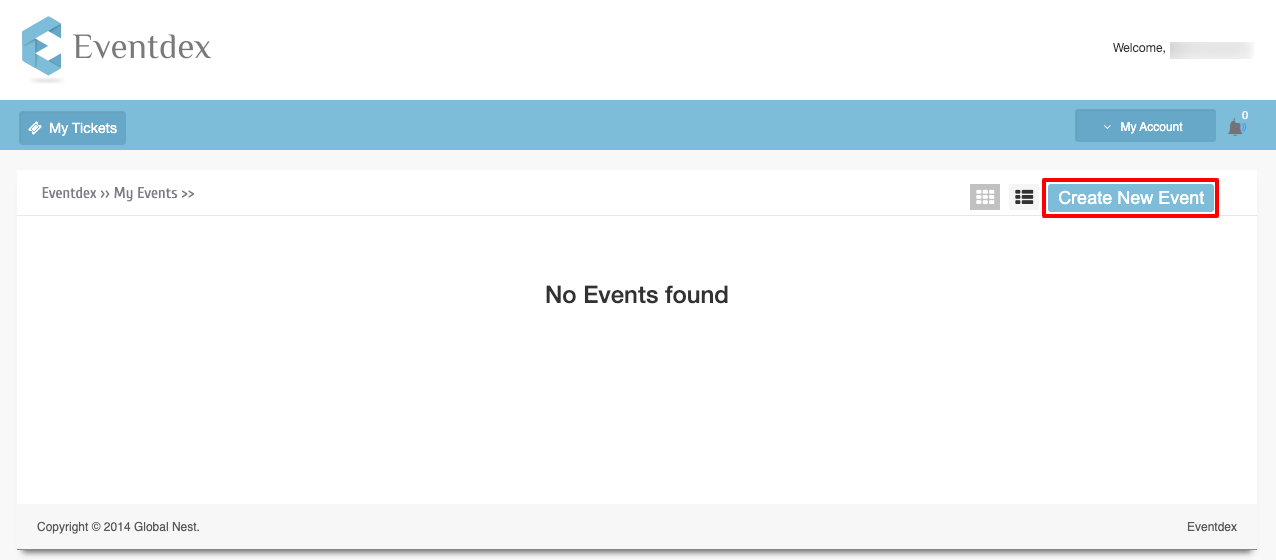
Click Create New Event
From your Eventdex account, click Create New Event
to begin setting up your event.
3
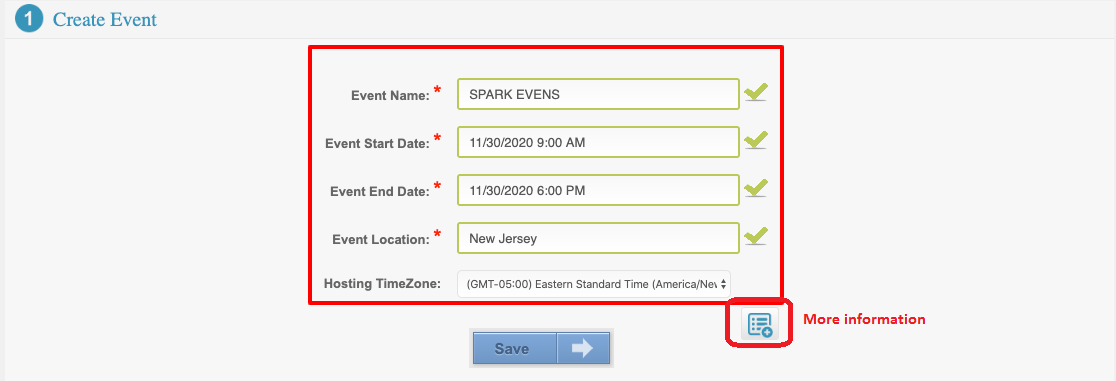
Enter your event details
Enter the required information for your event and save your changes.
Event Name
Required Event Start Date
Required Event End Date
Required Event Location
Required
4
Add more event information
To add additional information to your event, click
Add More Info.
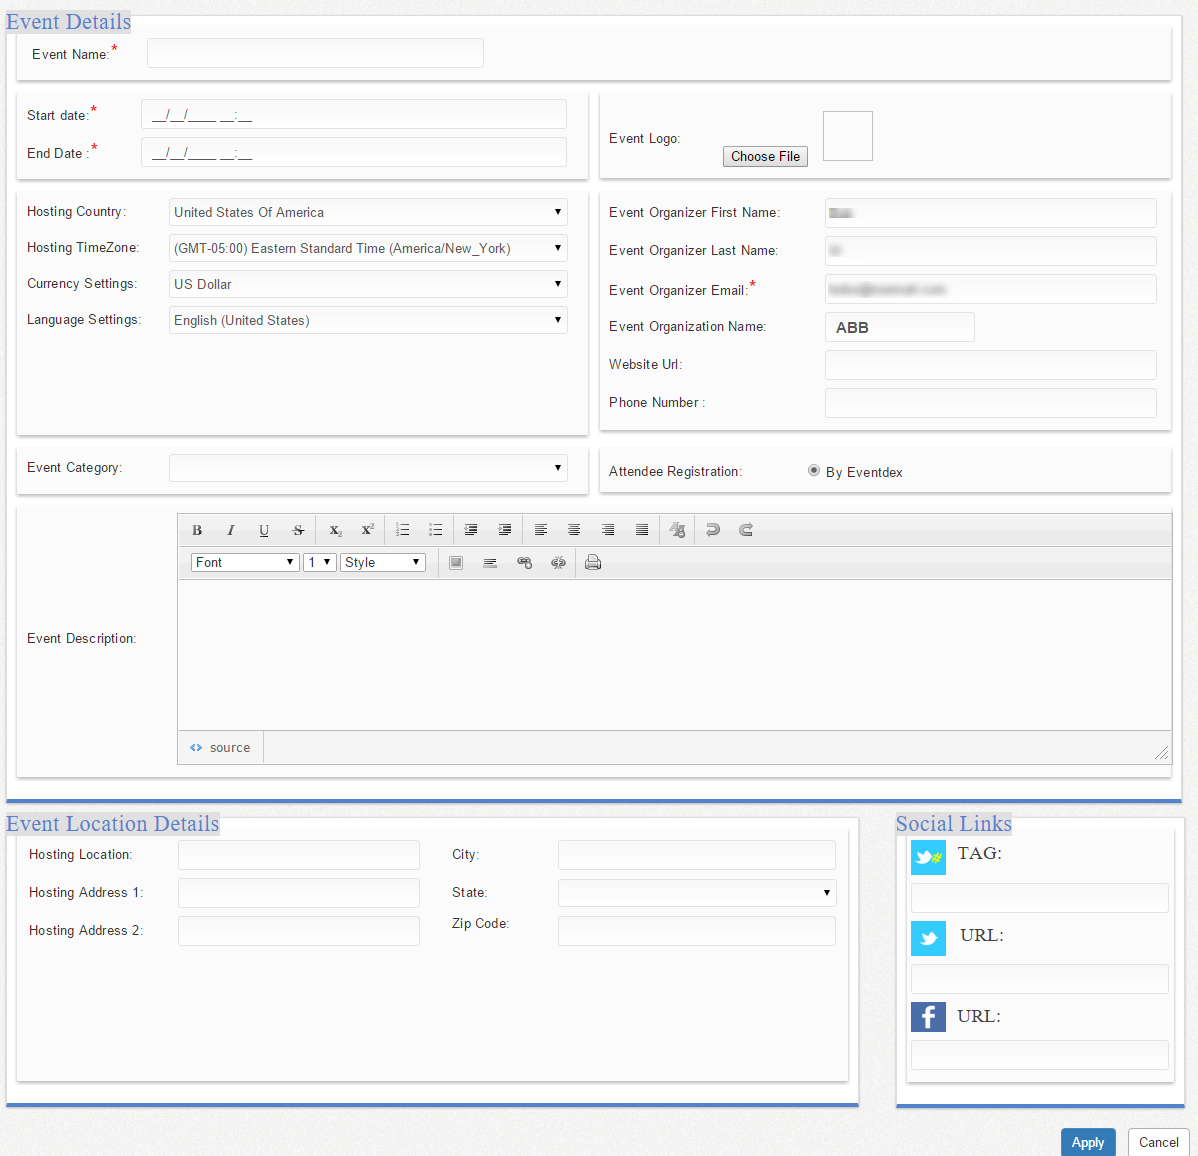
You can add additional details such as the event logo, event category,
event description, and detailed event location information.
Important:
Be sure to click Apply at the bottom of the page
to save your changes. STEP 2
Create Your Tickets
After creating your event, set up the tickets that attendees can purchase
or use to access your event.
1
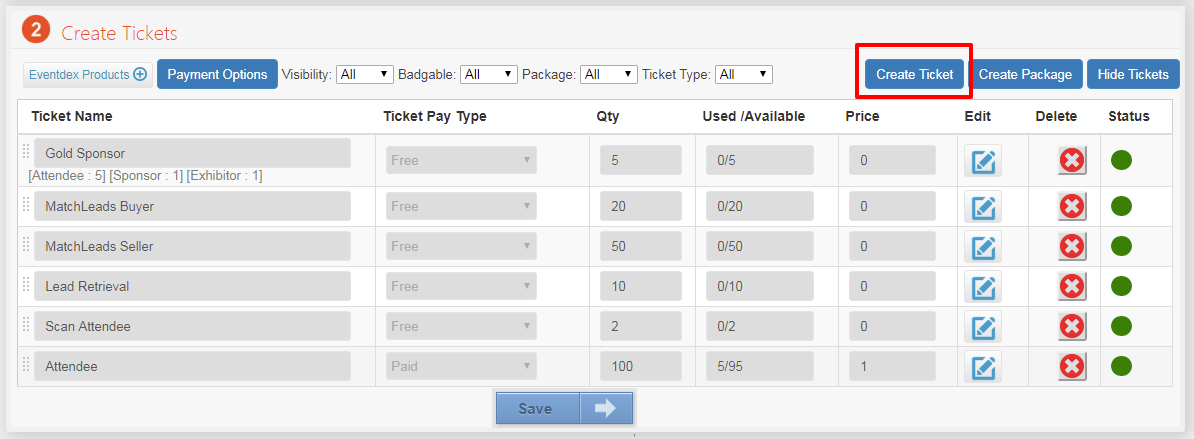
Click Create Ticket
Click Create Ticket to start configuring your ticket.
2
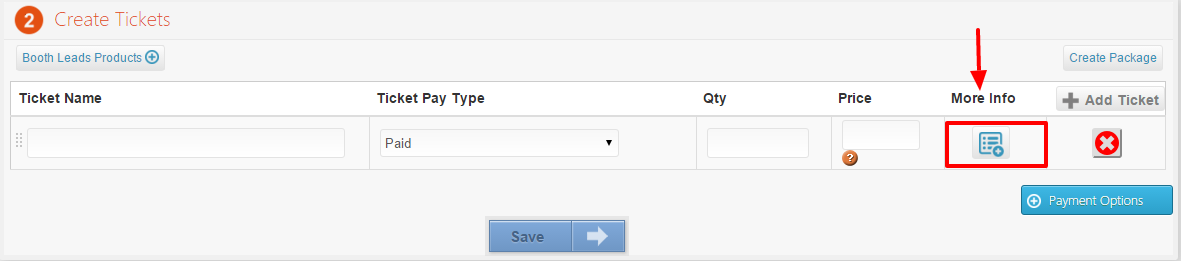
Enter the required ticket details
Enter the required information for your ticket.
Ticket Name
Required Ticket Pay Type
Required Ticket Quantity
Required Price
Required 3
Add additional ticket information
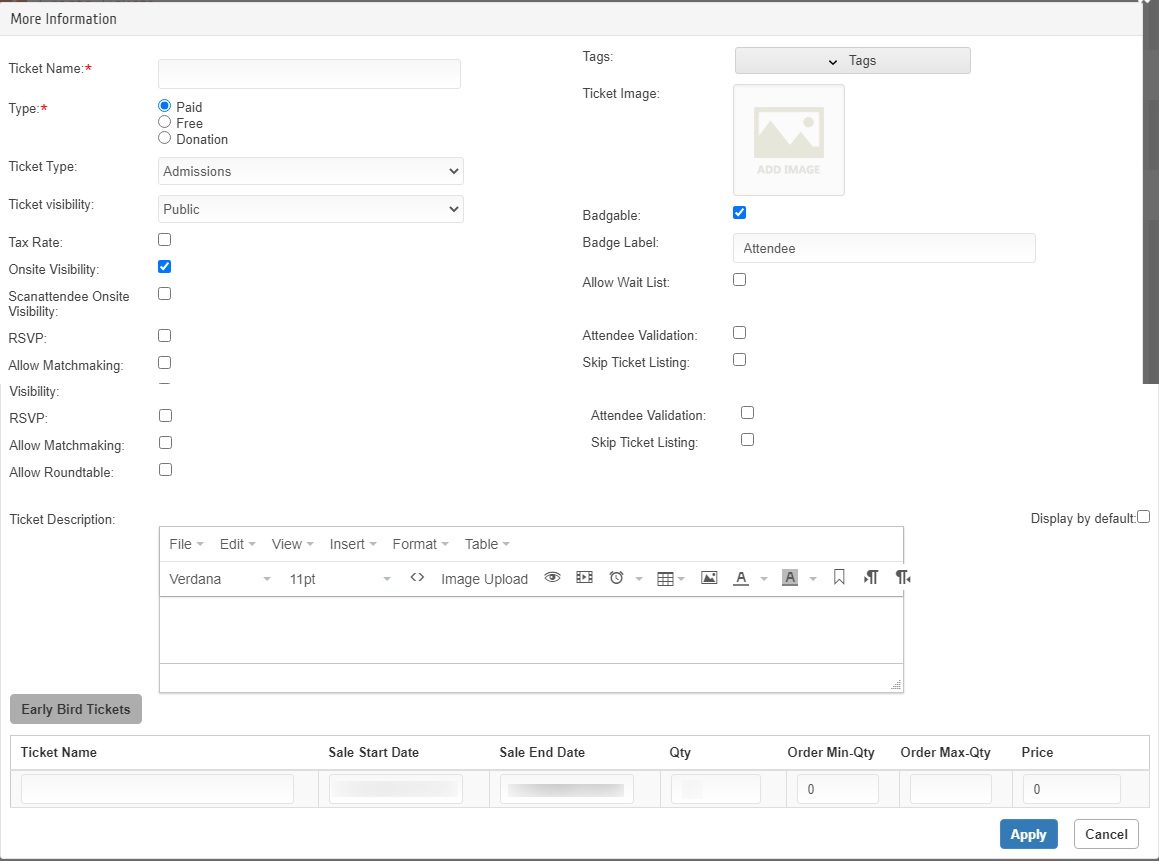
Click More Info to configure additional ticket
settings.
4
Choose a ticket type
Select a ticket type to define the attendee or registration category.
Admission
Standard attendee admission Exhibitor
Identifies the attendee as an exhibitor Sponsor
Identifies the attendee as a sponsor Speaker
Identifies the attendee as a speaker Seats
Used to select seats from a predefined layout Seminars
Used to create seminars Booths / Tables
Used to display exhibitors in the Eventdex App Sponsorship
Used to display sponsors in the Eventdex App Items
Used to add items Staff Admissions
Used for staff admissions 5
Assign Eventdex products
Depending on your event requirements, you can assign Eventdex
products to a ticket.
Lead Retrieval
Gives exhibitors access to the Eventdex Lead Retrieval app MatchLeads Buyer
Provides buyers access to one-on-one meetings with sellers MatchLeads Seller
Provides sellers access to one-on-one meetings with buyers Scan Attendee
Gives event administrators access to attendee scanning,
registration, badge printing, check-in/out, and statistics 6
Set ticket visibility
Public
The ticket is displayed publicly on the registration page. Private
The ticket requires a private registration link. Closed
The ticket does not appear on the registration page. 7
Configure additional ticket settings
Tax Rate
Turn tax on or off for the ticket. Onsite Visibility
Enable onsite ticket sales through the portal. Scan Attendee Onsite Visibility
Enable onsite ticket sales through the Scan Attendee app. Allow Matchmaking
Enable if the ticket holder will participate in Matchmaking. Allow Roundtable
Enable if the ticket holder will participate in Roundtable. Tags
Add tags to the ticket. Ticket Image
Add an image to the ticket. The image size cannot exceed 100 KB. Badgable
Enables badge printing for applicable physical admission tickets. Badge Label
Controls the label displayed on the attendee badge. Allow Wait List
Enable if the ticket should support a waitlist. Attendee Validation
Enable when invited attendees register for the event without selecting a ticket. Skip Ticket Listing
Skip ticket selection and send registrants directly to the registration form. Ticket Description
Add a short description for the ticket. Sale Start Date
Set the date when ticket sales begin. Sale End Date
Set the date when ticket sales end. Qty
Set the total number of tickets available for sale. Order Min-Qty
Set the minimum number of tickets a registrant can purchase. Order Max-Qty
Set the maximum number of tickets a registrant can purchase. Price
Set the ticket price. Important:
Click Apply to save your ticket configuration. STEP 3
Pick a Registration Template
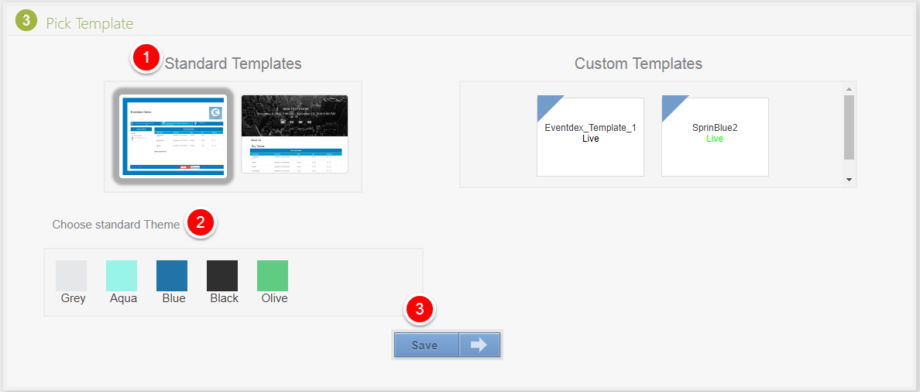
Select the registration template you want to use for your event.
The selected template will become your event registration page.
1
Select a template
Choose the registration template that best fits your event.
2
Save your template
Click Save to apply the selected template and
continue to the next step.
STEP 4
Publish Your Event
Once your event is configured, you can choose the appropriate event
status based on where you are in the event lifecycle.
Draft
Event is being configured and is not open for registration. Live
Event is active and tickets are available on the registration page. Pause
Registration is temporarily paused and tickets are not displayed. Check-In
Event is in the check-in stage. Completed
Event has been completed and event changes are restricted. Canceled
Event has been canceled and tickets are no longer displayed. 1
Draft
Use Draft mode while you are still building and configuring your event.
- Event status: Draft
- Administrators can add, edit, or delete tickets and manage the event.
- Tickets are not displayed on the registration page.
- A custom message indicates that the event is in Draft Mode.
2
Live
Use Live mode when your event is ready to accept registrations.
- Event status: Live
- Administrators can access and modify the event as needed.
- Tickets are displayed on the registration page.
3
Pause
Use Pause mode when you temporarily want to stop registration.
- Event status: Pause
- Administrators can access and modify the event.
- Tickets are not displayed on the registration page.
- A custom message indicates that the event is in Pause Mode.
4
Check-In
Check-In mode is used when the event has moved into the attendee
check-in stage.
5
Completed
Use Completed status after the event has finished.
- Event status: Completed
- Administrators can access the event but cannot make changes.
- Tickets are no longer displayed on the registration page.
- A custom message indicates that the event is in Completed Mode.
6
Canceled
Use Canceled status when an event has been canceled.
- Event status: Canceled
- Administrators can access and modify the event.
- Tickets are no longer displayed on the registration page.
- A custom message indicates that the event is in Canceled Mode.
✓ Your event setup is complete!
You have created your event, configured your tickets, selected a registration
template, and published your event. Your event is now ready for the next stage
of your event planning process.
Need a visual walkthrough?
Watch our Eventdex video guide for an overview of the event creation process.
Watch the Eventdex Event Setup Video →
Quick links