Step 1: Install the printer drivers to communicate with the printer on the PC.
Make sure to follow the suitable options while installing a USB wire connected or Wi Fi. (Check Zebra, and Brother printer configuration sections below before going to step 2)
Step 2: If you are using Wi Fi printers, please use QZ Tray, install QZ Tray from here: https://qz.io/download/ on your PC
Step 3: Go to the Scan Attendee Web App by typing the following in the browser. https://sa.eventdex.com/
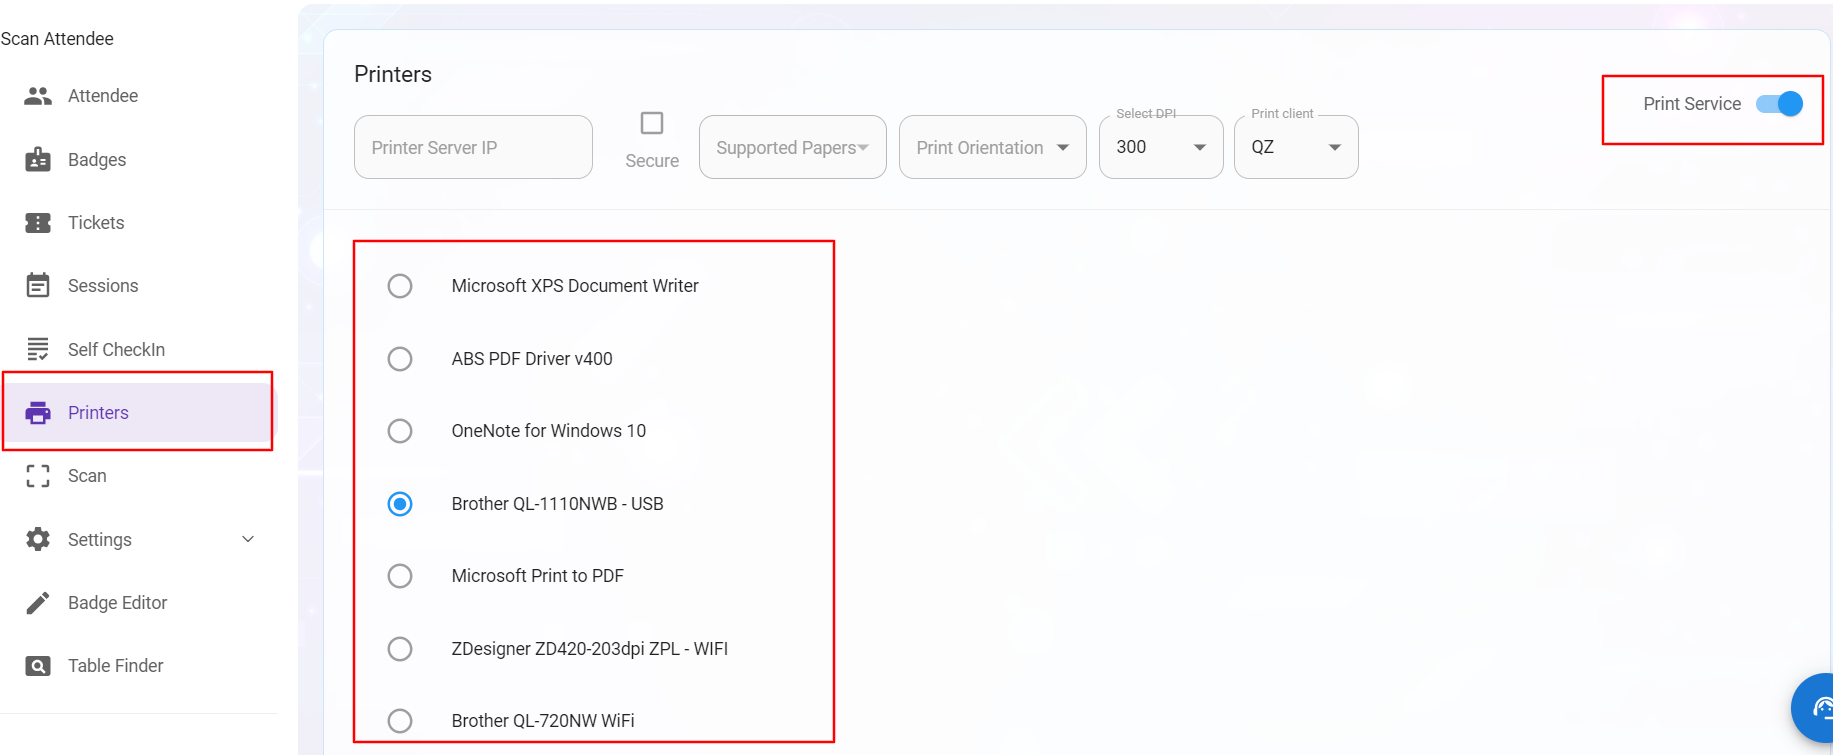
Step 4: Go to the printer screen, make sure the print service (QZ Tray) is selected, and select the printer from the listing. QZ tray is required only if you use a Wi-Fi printer.
If you don’t see the printers, toggle the Print Service button and ensure QZ Tray is running.
Step 5: Go to the Attendee screen and print the badge. Please make sure you select the right badge template.
Step 6: Printer Configuration for Zebra and Brother Printers.
For Zebra Printer Configuration:
https://www.zebra.com/us/en/support-downloads/printer-software/by-request-software.html
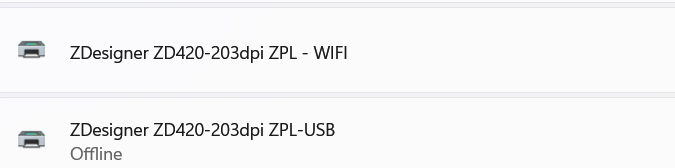
A. Download the Zebra driver for each individual printer model from the Zebra website. Please make sure to install separate drivers if you are using Wi-Fi and USB, as shown below.
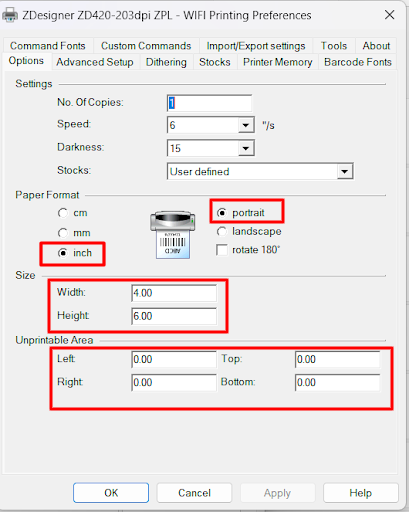
B. Please select your badge dimensions in the printer “Properties” as shown below.
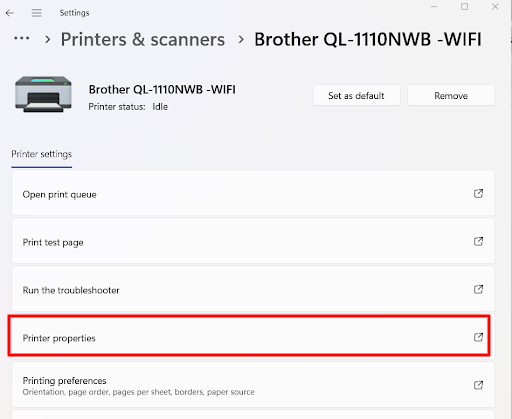
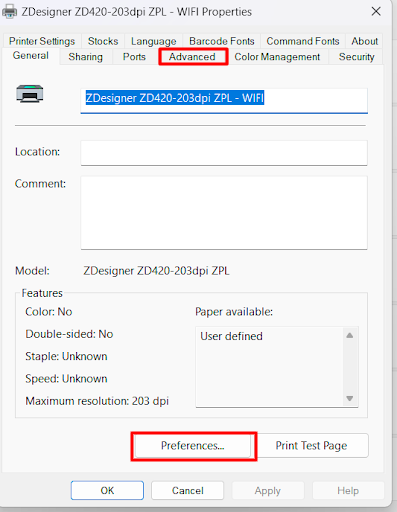
C. In the General tab, go to Preferences,
D. In the above screen, select Advanced Setup to go to the next below screen.
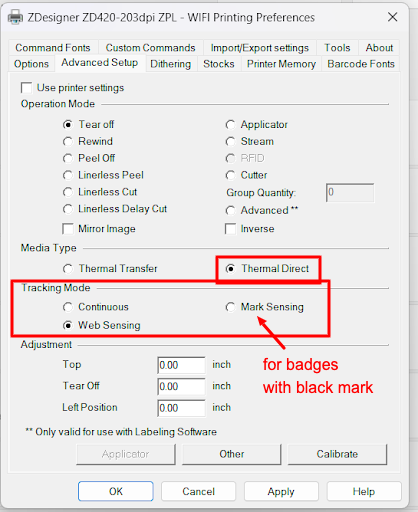
Important takeaways from the above 2 screens. Please make take notice of the following information
- Size: Wwidth 4 and Height 6 (This is an example size)
- Margins all Zeros
- Paper format , inches and Portrait.
- Meda Media Type Thermal Direct
- Web Sending – if you have a notch.
- Mark Sensing – if you have a mark on the back of the badge.
For Brother Printer Configuration:
A. https://support.brother.com/g/b/productsearch.aspx?c=in&lang=en&content=dl
Download the Brother Driver for each Printer model from the Brother portal. Please make sure to install separate drivers, if you are using Wi Fi and USB as shown below.
B. Brother rolls are pre-cut label rolls available in various sizes to fit different labeling needs
Usually, they have fixed size (Die Cut) or continuous rolls.
Configure the printer as shown below.
Example for for fixed size or Die Cut roll
(62mm * 100mm 2.4″ X 3.9″ DK-1202)
Since we already know the width and height, please select the exact dimensions in the printer properties shown below.
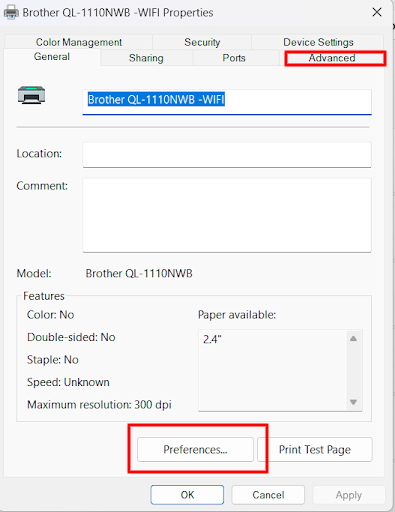
C. You will find the same content displayed below the screen in both locations, as shown above.
- Preference
- Advanced tab >>Printer Defaults.
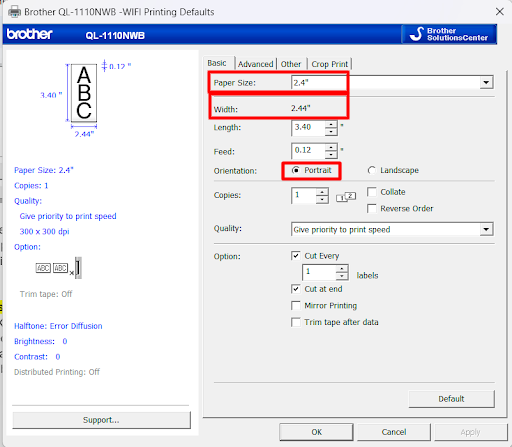
- For fixed size or Die Cut roll, select Paper sizes from the predefined picklist in the Brother settings.
- The orientation should be set to portrait mode.
Example for continuous roll (Follow above instructions from the beginning)
62mm * 30.4m 2.4″ X 100″ DK-2205
Here the width (2.4”) is fixed, you can design your badge with your required length.
Assume the badge size is 2.4” X 3.4”
D. It’s crucial to note that you can only choose the width from the predefined picklist in the Brother settings, while you’ll need to enter the length in the provided text box.
Here you see in the below image, selected 2.4” from the pick list and and gave give 3.4” in the Length text box.
The orientation should be set to portrait mode.