To Add Payment Gateways:
Step 1: Go to Eventdex Portal >> Login with your credentials >> Select your Event
Step 2: Click on the “Ticketing” tab and from its accordion menu, click on the “Tickets” tab.
Step 3: Click on the “Payment Options” tab and the page navigates to a new screen. You will be able to see the below options:
PayPal Adaptive:
Step 1: To setup PayPal Adaptive gateway, Go to Payment Settings >> Online registration
Step 2: Select PayPal from the Payment Gateway Options and select PayPal Adaptive.
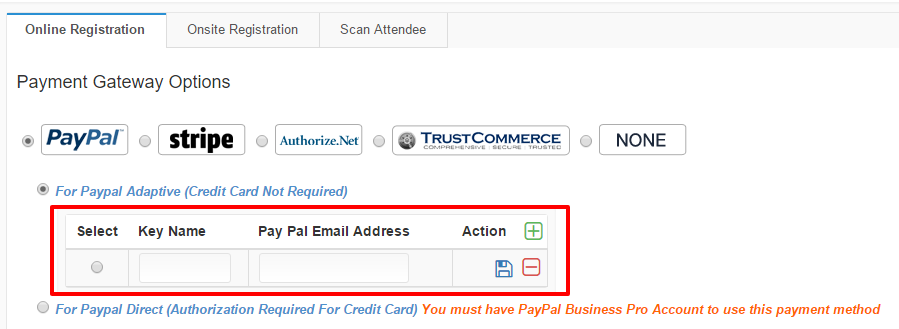
Step 3: Click on “+” beside the action.
- Key Name: Enter a key Name
- PayPal Email Address: This is normally the email used to log into PayPal.
Step 4: Make sure to save the settings.
PayPal Direct:
Step 1: To setup PayPal Direct gateway , Go to Payment Settings >> Online registration
Step 2: Select PayPal from the Payment Gateway Options and select PayPal Direct.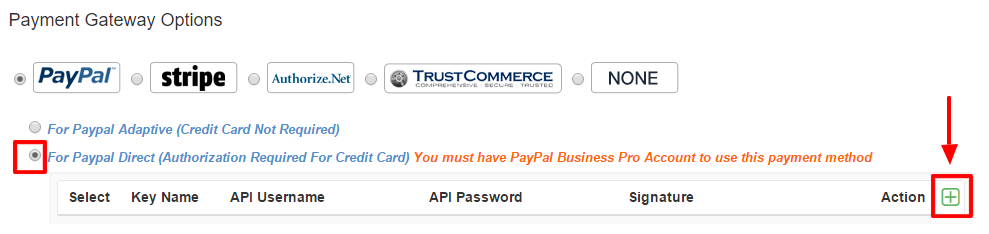
Step 3: Click on the “+” button next to the Action and enter the required information.
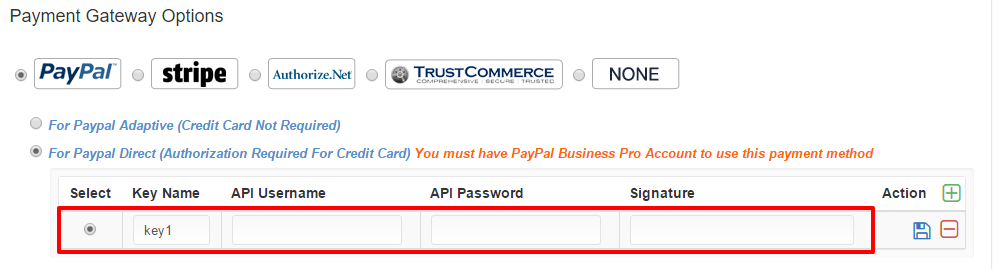
- API Username: Enter your PayPal API Username. (This is found in your PayPal account)
- API Password: Enter your PayPal API password. (This is found in your PayPal account)
- Signature: This is found in your PayPal account.
Step 4: Click on the Save button and make sure to save all changes made in payment settings.
Stripe Adaptive:
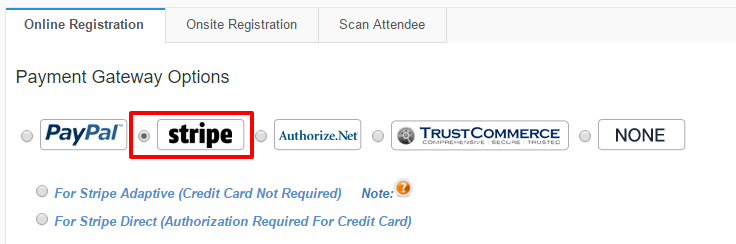
Step 1: To set up Stripe Adaptive gateway , Go to Payment Settings >> Online registration
Step 2: Select Stripe from the Payment Gateway Options and select Stripe Adaptive.
Stripe Direct:
Step 1: To set up Stripe Direct payment gateway, Go to Payment Settings >> Online registration
Step 2: Select Stripe from the Payment Gateway Options and select Stripe Direct.
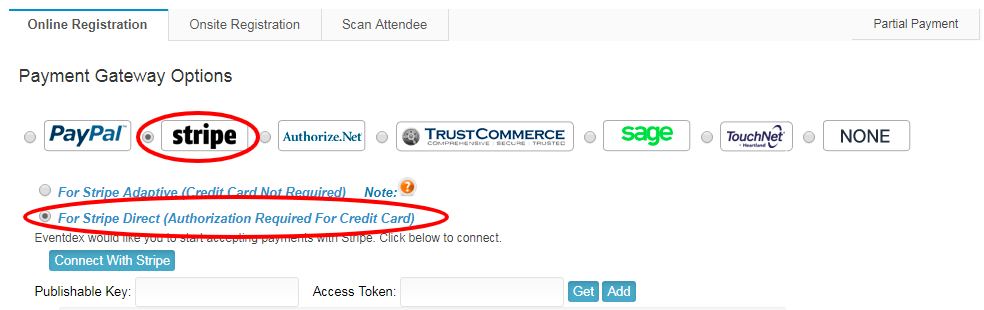
Step 3: Click on the “Connect with Stripe” ![]() button. You will redirect to another page for login to Stripe account or setting up a new Stripe account.
button. You will redirect to another page for login to Stripe account or setting up a new Stripe account.
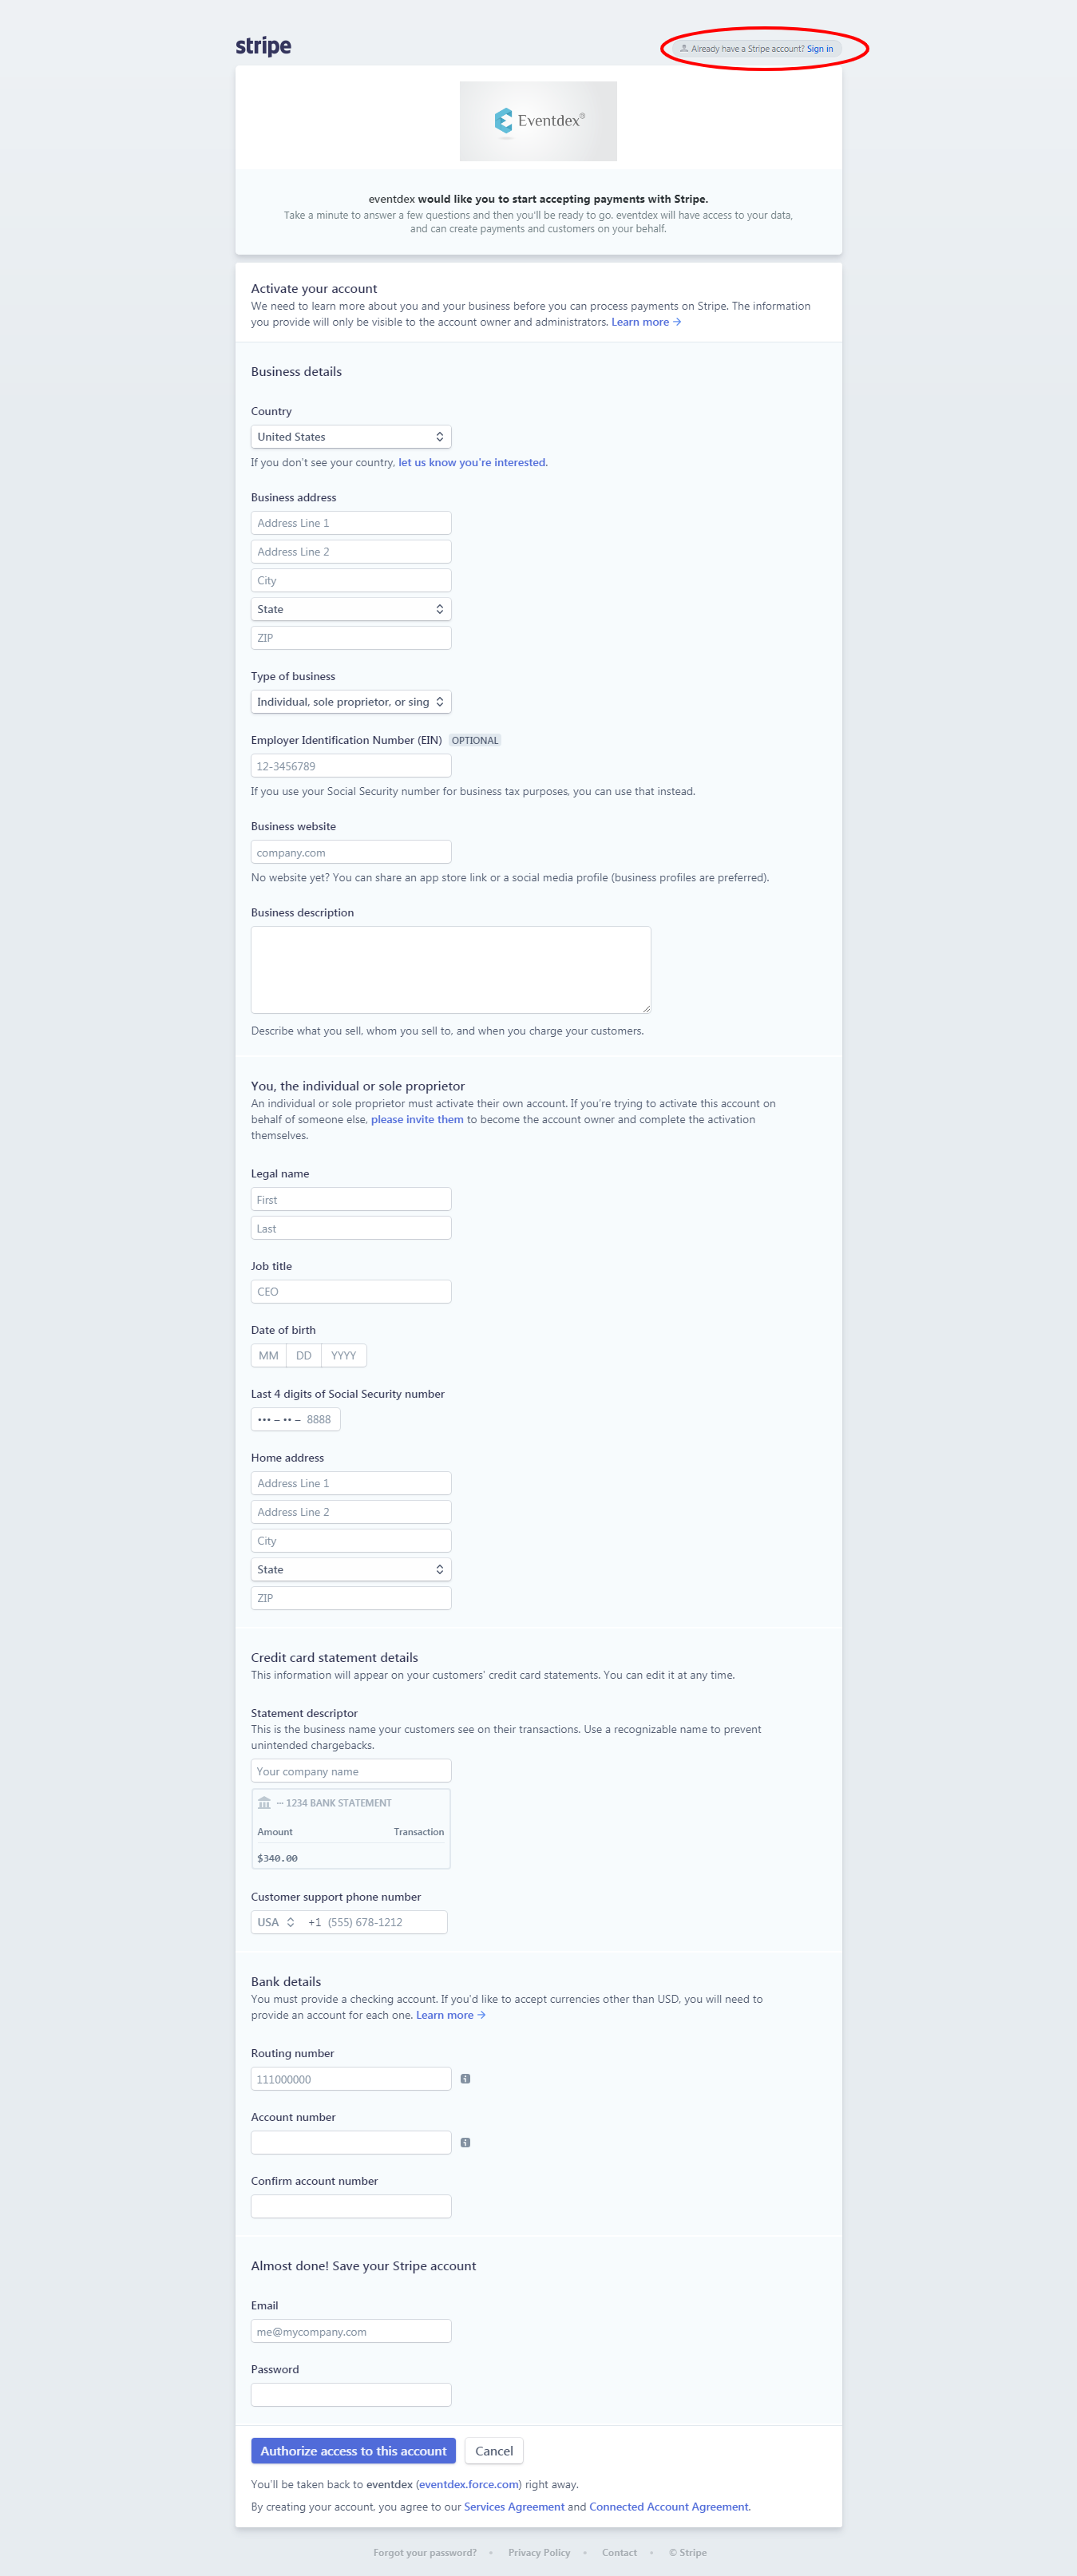
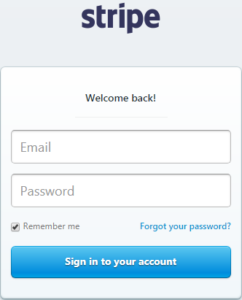
Step 4: If you already have a Stripe Account, please sign in (Please look at the sign-in option marked red in the above image).
Now you are all set with Stripe Direct Payment Gateway set up after successful login.
To check the Publishable Key and Access Token are placed, please follow step1 and step2 for the Payment Options section and select Strip Direct. If you are able to see the values, you are all set.
Authorize.Net:
Step 1: To setup Authorize.Net gateway, Go to Payment Settings >> Online registration
Step 2: Select Authorize.Net from the Payment Gateway Option.
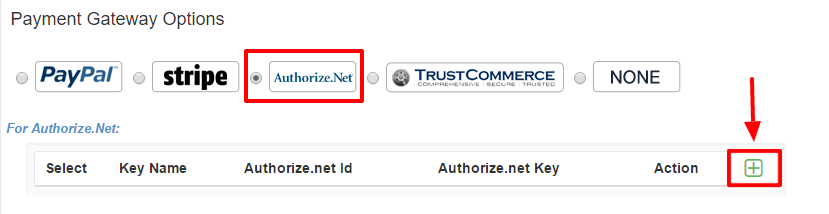
Step 3: Click on the “+” button next to the Action.
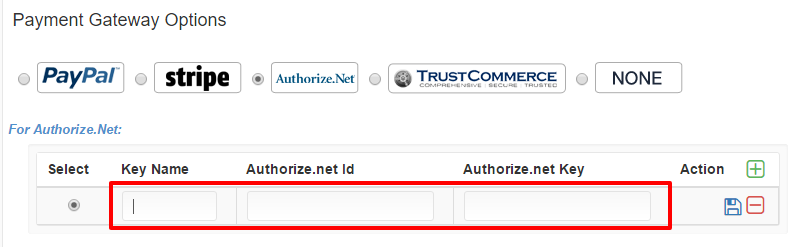
Enter Key Name
- Authorize.net Id: (This ID is available from your Authorize.net account)
- Authorize.net Key: (This transaction key is available from your Authorize.net account.)
Step 4: Make sure to save the settings.
TrustCommerce:
Step 1: To setup TrustCommerce gateway , Go to Payment Settings >> Online registration
Step 2: Select TrustCommerce from the Payment Gateway Option.
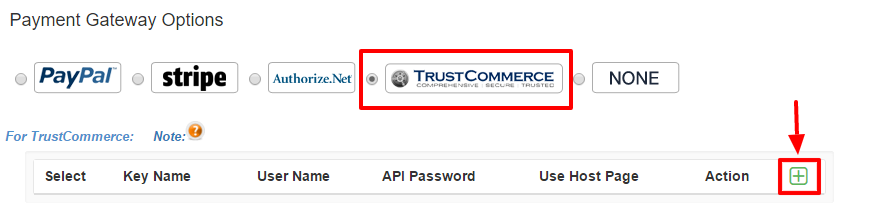
Step 3: Click on the “+” button next to the Action.
Enter Key Name, TrustCommerce User Name, API Password and click on Save.
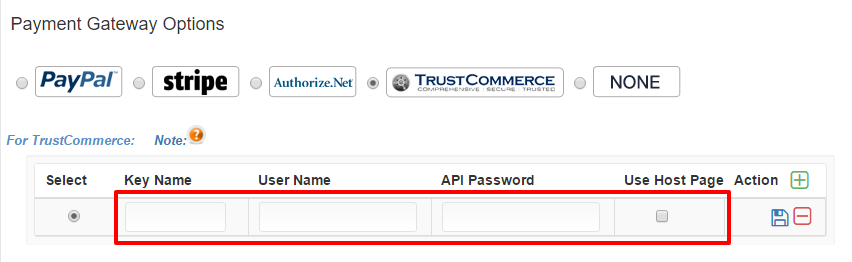
Step 4: Make sure to save the settings.
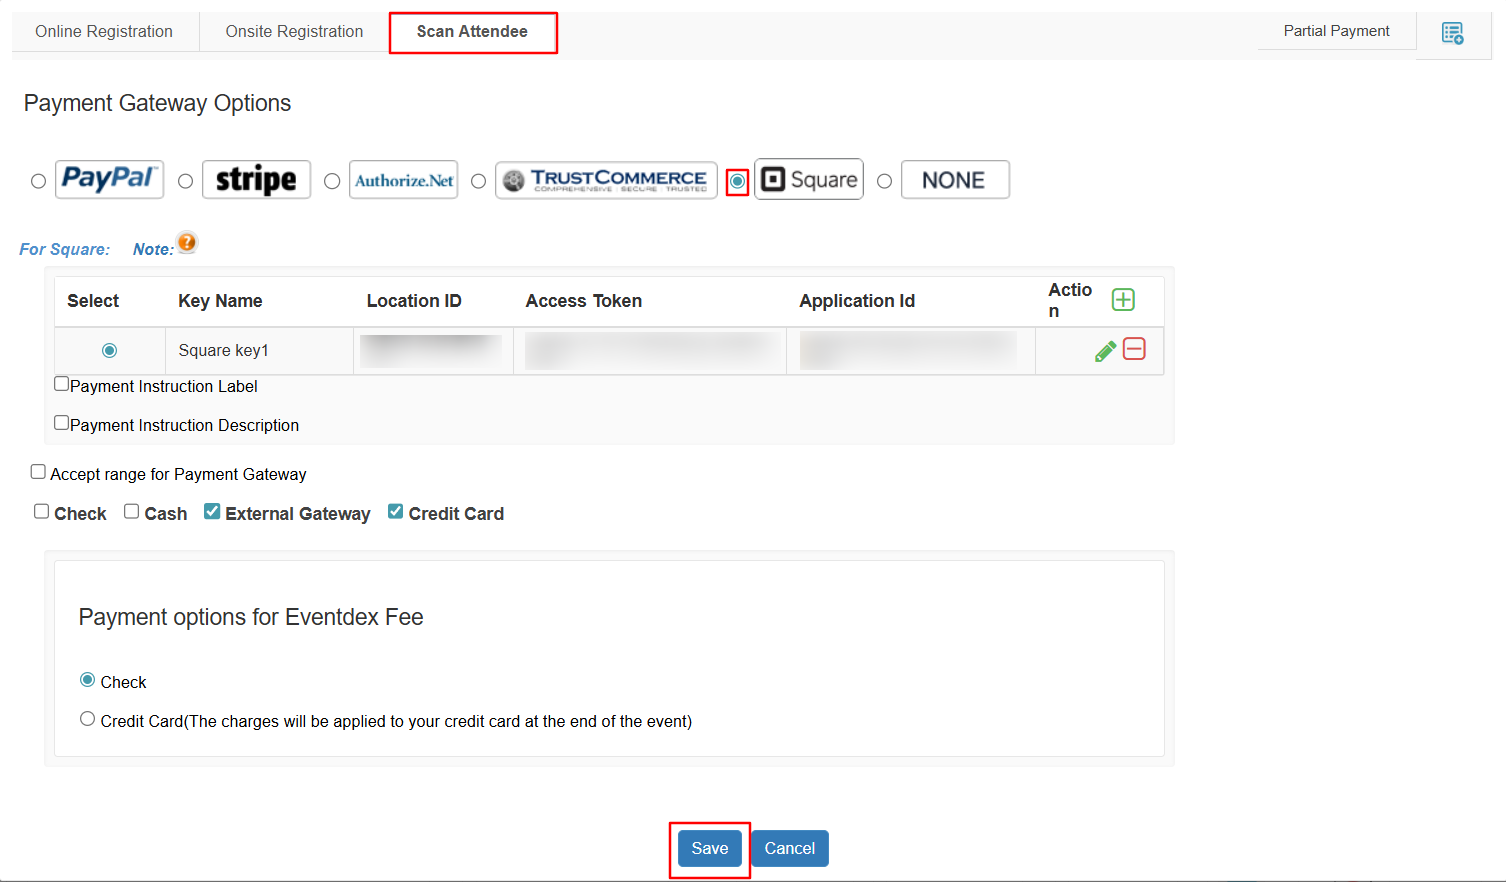
Square:
Step 1: To setup Square gateway , Go to Payment Settings >> Online registration
Step 2: Select Square from the Payment Gateway Option.
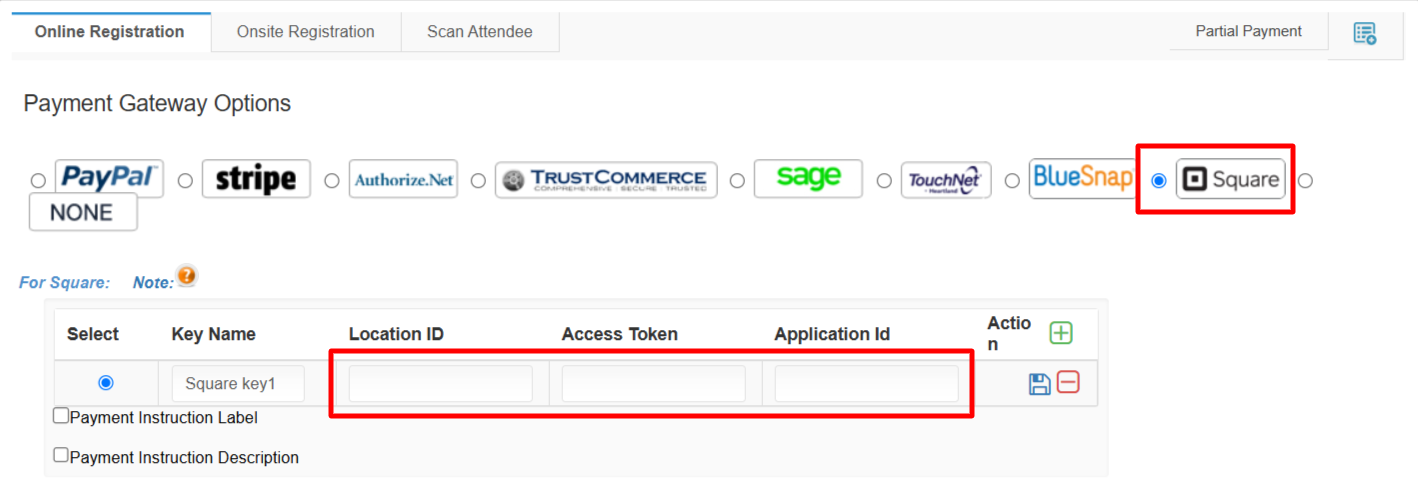
To know Location ID, Access Token, Application Id, login to https://developer.squareup.com/ and click on “Applications”
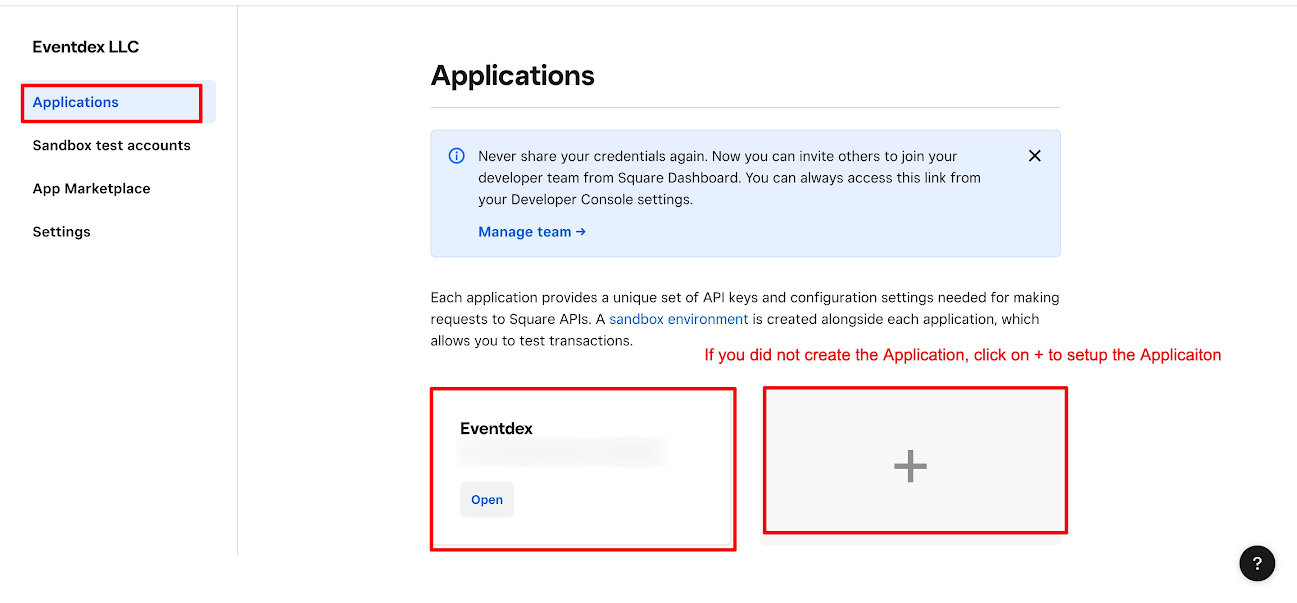
Then select “Credentials” and switch to Production on top and you will find the Application ID, Access Token and Location details.

Step 3: To setup Square Payment Gateway for ScanAttendee Mobile Application, go to Payment Options and Select ScanAttendee.
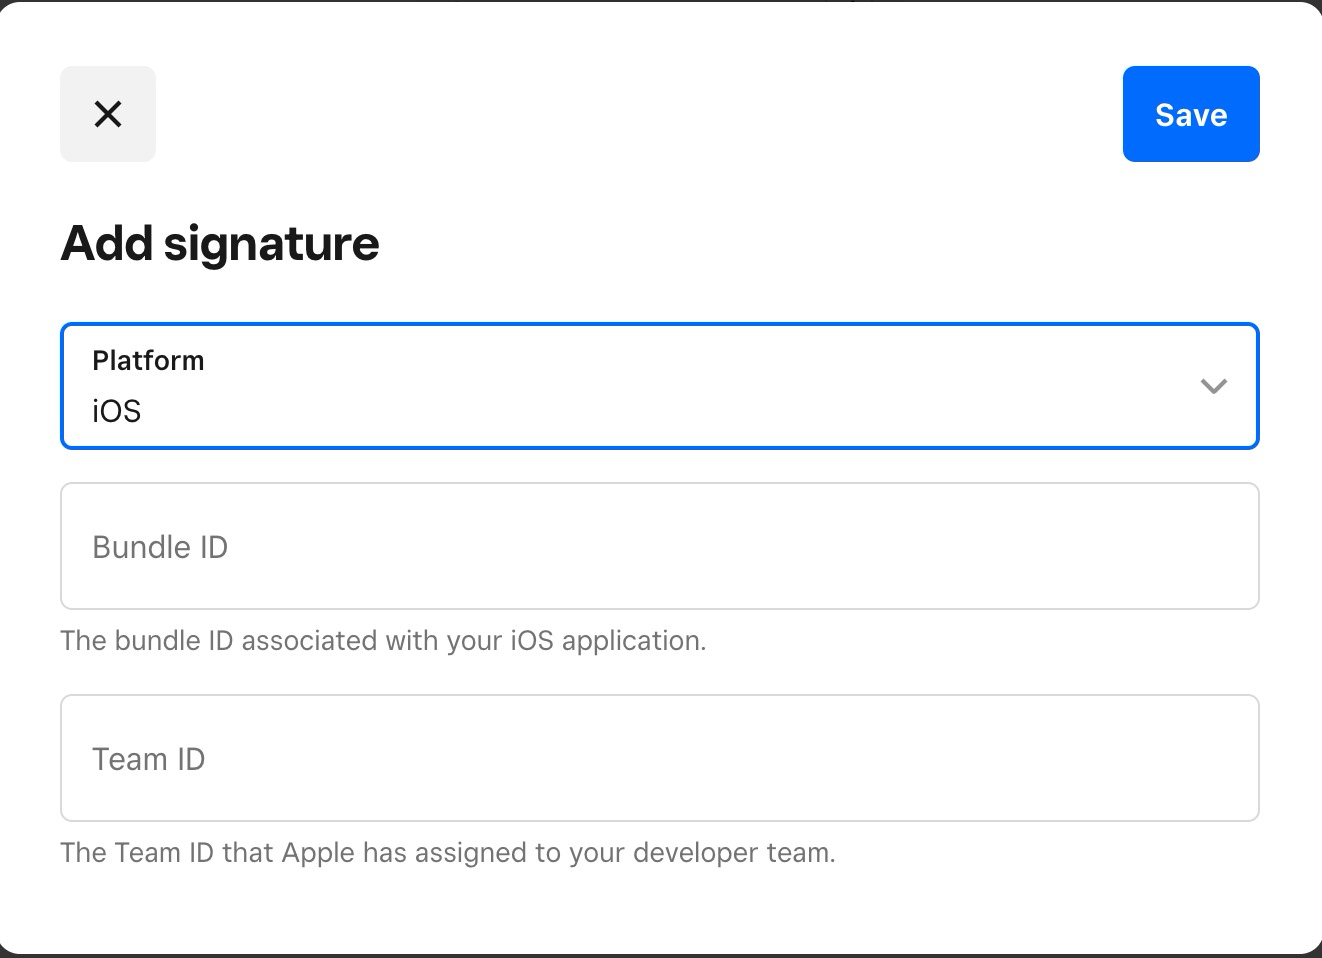
For onsite ticket sales at the event location using our ScanAttendee Mobile application, please add below Bundle ID and Team ID as shown below.
After login to your Square account, navigate to Mobile Payments SDK. You can refer the screenshot below.

Click on the Add signature button to add the Bundle ID and Team ID below to your Square account and save it. Refer to the screenshot below.
Step 4: After adding the information in the payment options, press “Save” at the bottom.
Now, login to the Scan Attendee Mobile app and test buying a ticket and check the payment process.
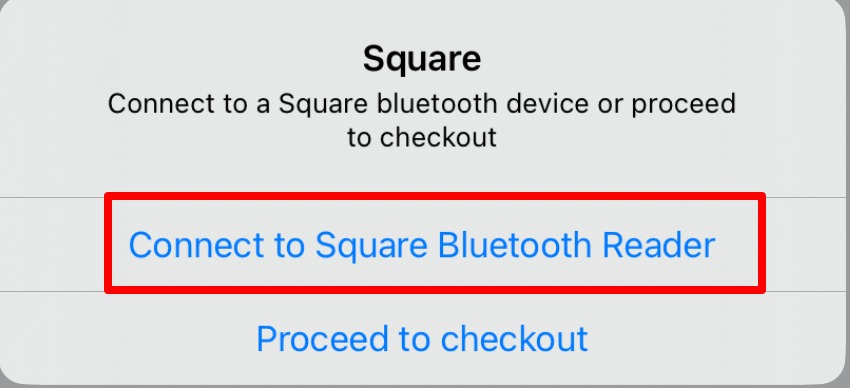
When prompted to choose a payment method, please select “Credit Card.” Choose “Connect to Square Bluetooth Reader” on the pop-up screen to see the Square SDK settings. (Refer to the screenshots below)
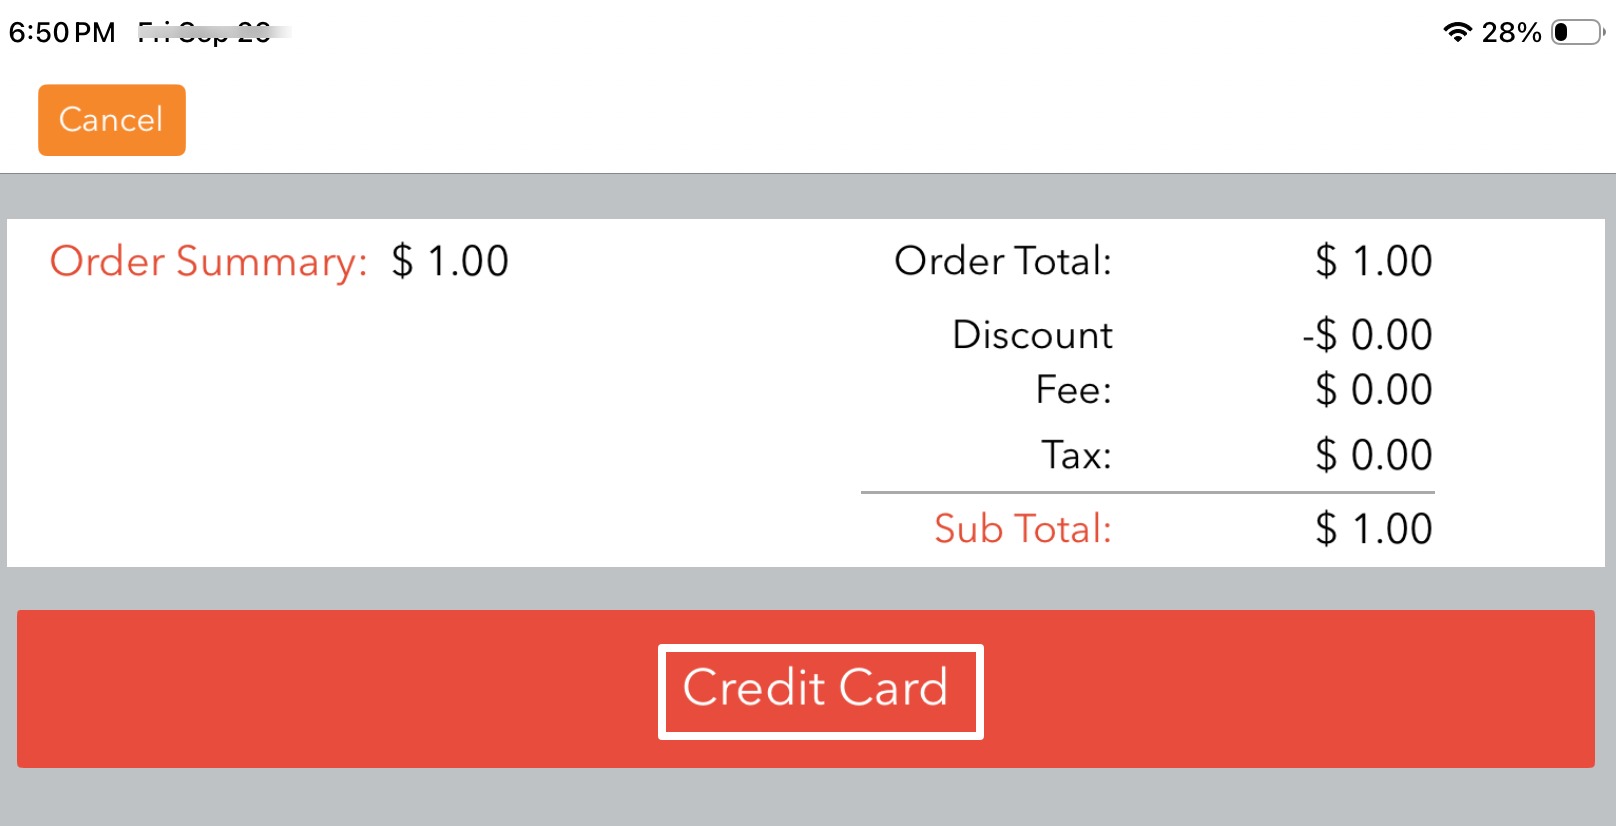
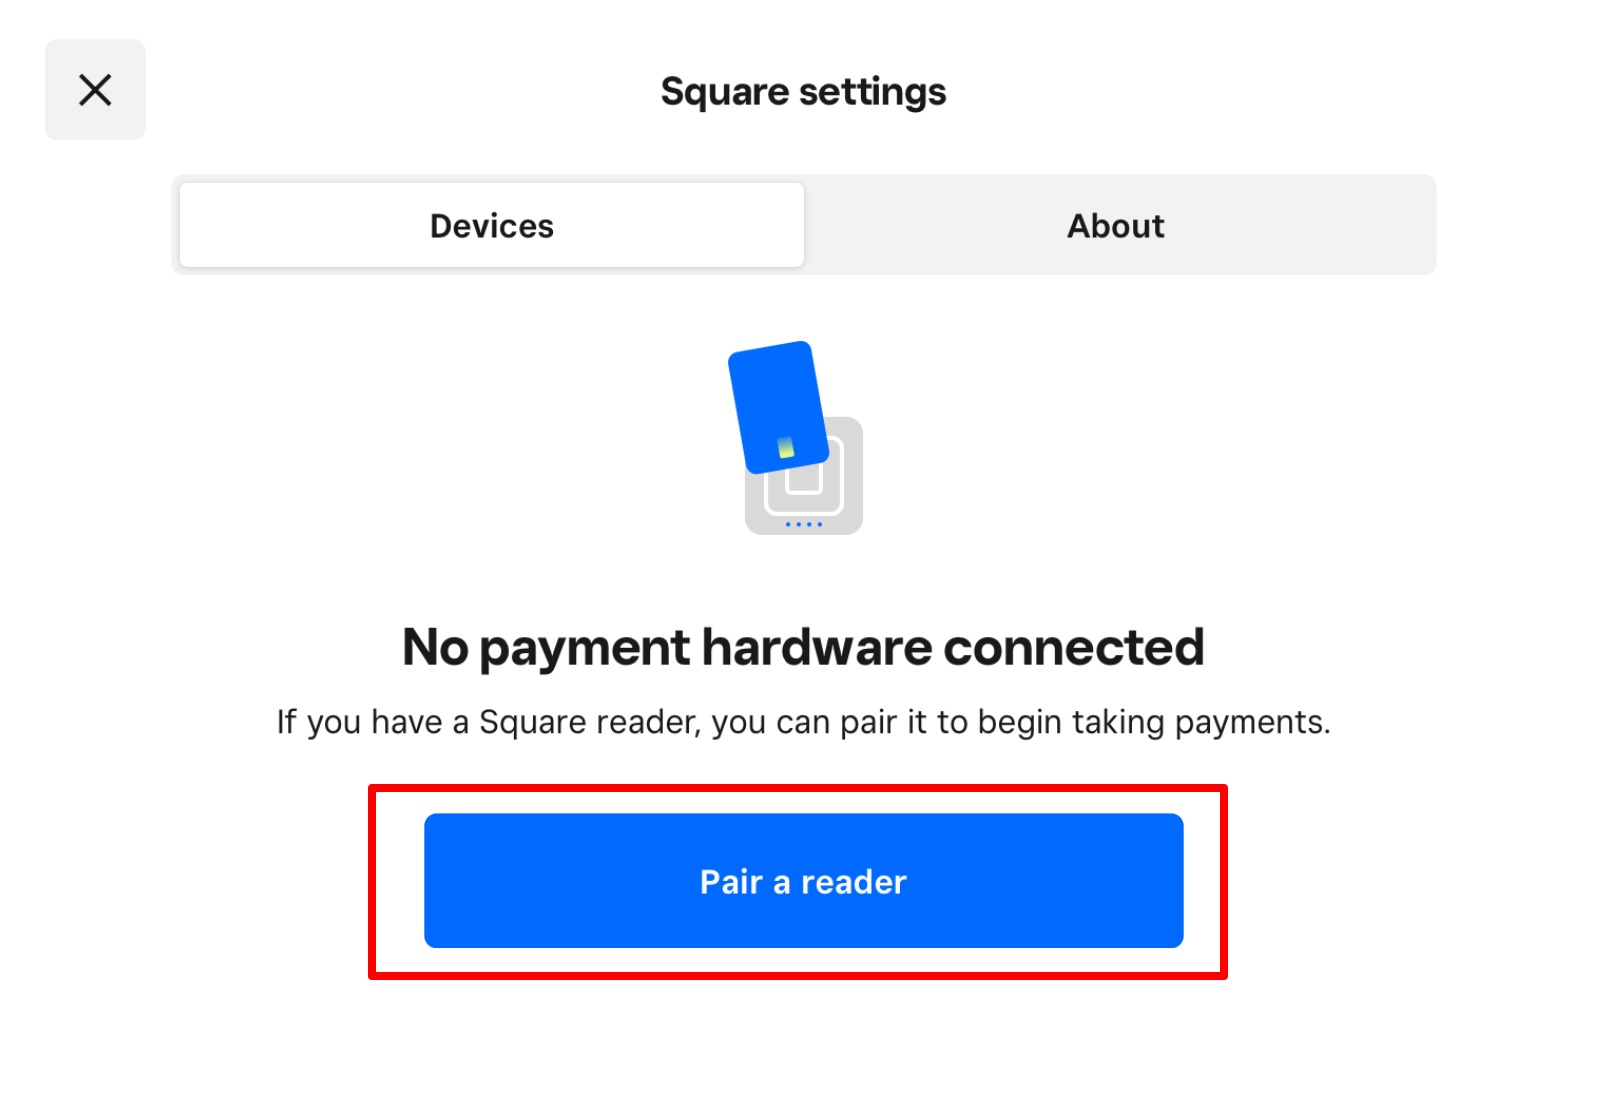
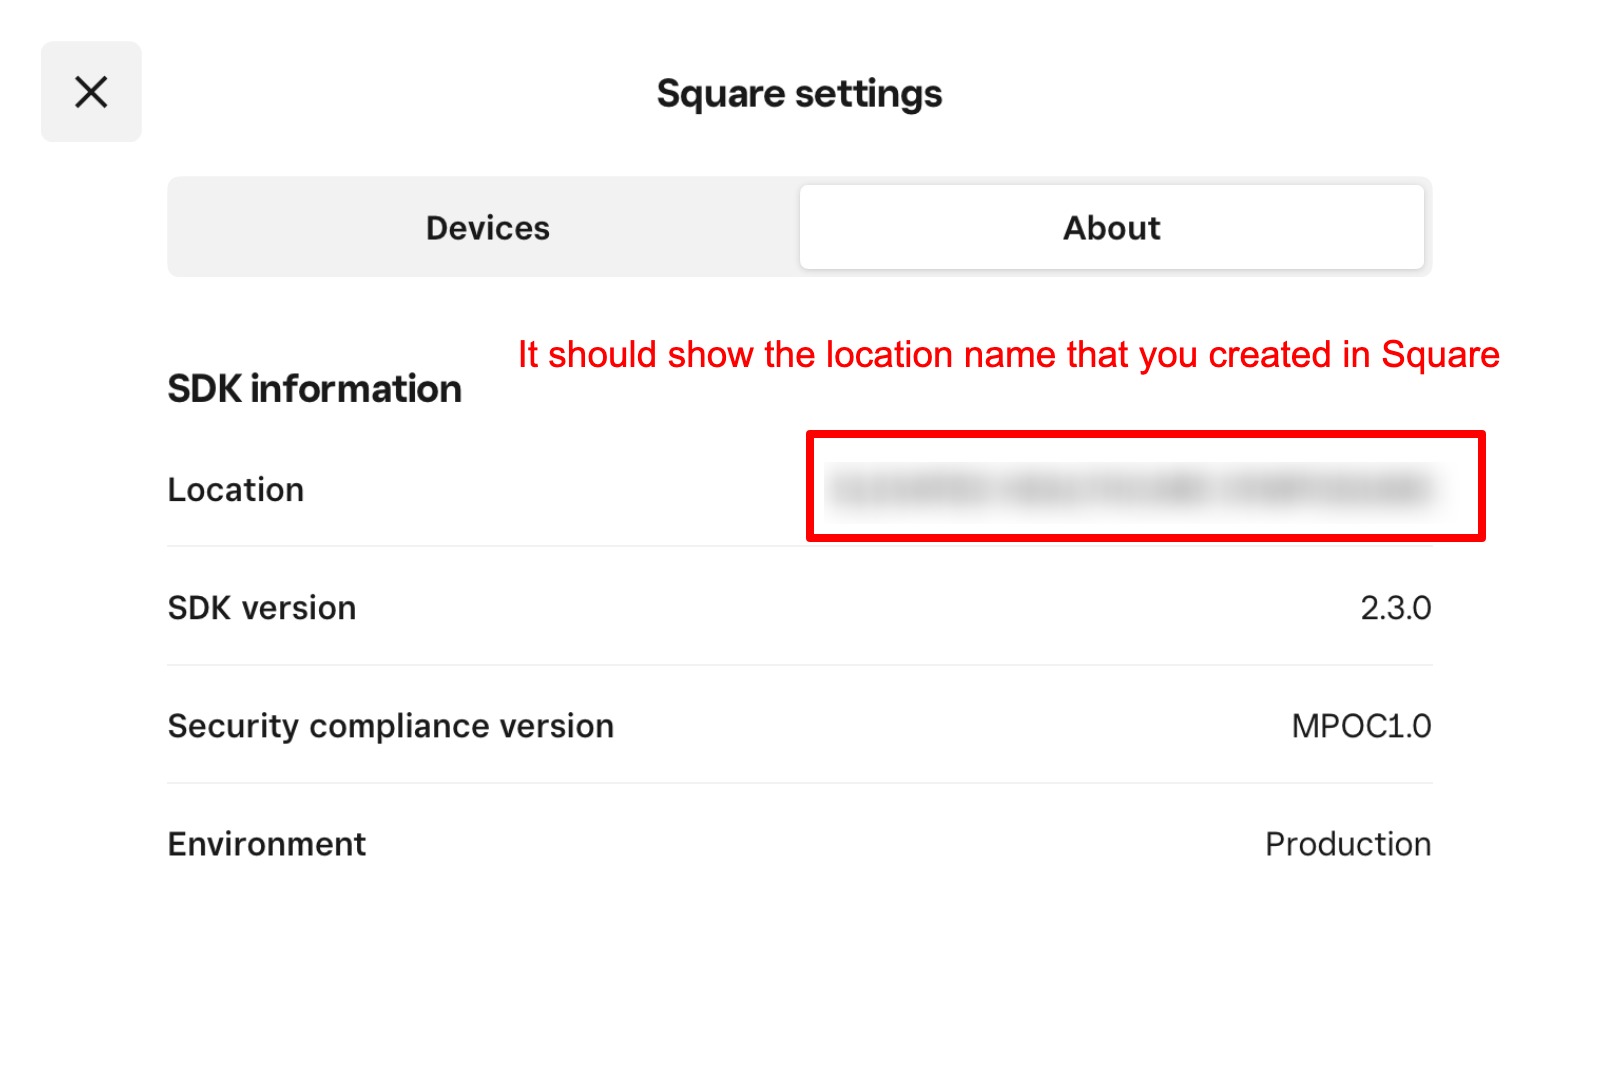
On the next screen, tap on “Pair a reader” to check the settings. Ensure that the location displayed is the one you created in Square. If you see “Eventdex” as the location, close the app and restart it, then check again.
After reviewing the settings, purchase a ticket and verify the payment process in the Square account and Eventdex admin portal.
Now you can begin selling tickets with our ScanAttendee Mobile app and collect payments.